Tuesday, 19 December 2017

Coralee ~ December Kit ~ At The Pool

Hello once again Scrapbooking Friends! Today I'm happy to bring you my layout using the December Embellishment kit. Execution of this layout is really quite simple however it looks so much more complicated than it is. For a unique twist the only paper used for this layout was white cardstock for the background. The rest consists entirely of items you would consider embellishments!

The main aspect of the layout is all those strips. They are a combination of washi, ribbon and twine both from the embellishment kit and from my stash.
To get more use out of the washi and ribbons behind the photo I cut them so that they weren't going all the way behind the image. To ensure they lined up correctly I used a ruler to guide me whilst adhering it all. I used every washi and ribbon in the kit. and I absolutely love the affect it gave. 


To embellish the layout I used these stunning crochet leaves here in the bottom left corner with these cute enamel dots. I also used some of the blue bling strips to add that tiny bit extra 'wow' factor. 

Throughout the page I scattered the sequins and metallic flowers that were in the kit. My trick for this is to literally drop them in different sections of the page and then stick them where they fall.


At the top of the page I again used the blue bling, and as a finishing touch used one of the amazing frangipani flowers. 

And that is it! Really quite a simple layout when you think about it. I hope you liked it!


Monday, 18 December 2017

Jarka Ef- Summer Moodboard TN

Hi all!

Jarka here. Today I´m writting about my layout in my Traveller´s notebook. It´s made for our Summer Moodboard challenge. The challenge is for non-standard scrapbooking. See the rules in the Challenge Tab.


I need to say, this was very funny for me to create summer layout, because it´s winter in my country :D

Ok, back to my creation. I used the picture of my son with sunglasses- I just like this picture. He is so cute here. You can watch my process video (turn on the english subtitles), but I like to say something about the pictures now:


Here you can see the finished layout. I searched my box of small cuts of papers and selected some of them to match with our moodboard. And I found some very nice summer stickers. It was my earlier stock.
***


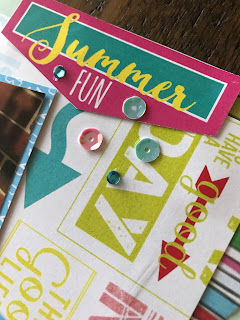
This sticker is just perfect :D I added some enamel dots too. And here you can see also the small bottle with cute pink flowers, which are in the sewn tag. The red background is textured, when you look at it close.
***


Here is the tag. It´s made of small piece of scrapbook paper and vellum paper. This vellum paper is a little bit transparent, so you can see the flowers inside.
***


This one is just to show you this suitcase. Isn´t it nice? I like the detail of it.
***


So, this is it. Wish you nice watching. (EN subtitles available).


Saturday, 16 December 2017

Sarah - December Kit - Summer Fun

Hello crafty friends! Sarah here with a Summery layout using the amazing December kit. Again I have completed another page in my 2016 Documenting December 6X8 album with these two photos of my youngest son soaking up the sun on our verandah. While these photos were not planned that way, the poses and 'sunshine smiles' just melt my heart!

For this layout I used the papers included in the December Scrapping Fun Kit - I just love the base paper shown here with all of the text on it. I tore some of the striped paper and layered this underneath. The blue snorkel paper is also so fun and complimented the blue in the photos nicely, so I matted my photos with this paper. The chipboard piece 'Just kicking back' was ideal for this layout.
The cut aparts in this kit are fantastic - I used the Summer Fun and Sunshine Smiles ones for this layout, accompanied by some bling and sequins. I added the glittery number 28 from the Documenting December kit to finish off the layout.
If you havent already got your December kit, they are while stock lasts at the Scrapping Fun Kits etsy site. Until next time....

Friday, 15 December 2017

Morgyn ~ December Kit ~ Weekly Planner Spread

Hi everyone

Morgyn here sharing how I am using this months embellishment kit.

I am using the kit to decorate my Travellers Notebook planner (you can see how I made it here).  I use this as my weekly overview of whats happening and when.  I love that the embellishment kit is so versatile that I can use it in my planner as well as use it to scrap with :)

Here is this weeks spread:


This kit is perfect for this lovely summer weather we are having + my kids have been eating ice blocks like they are going out of fashion!

Here is a close up of the weekly spread:


I have used the roller stamp from the basic's kit to date my days of the week and the pineapple paper clip is a pretty yet functional embellishment to hold any little notes during the week.

A close up of the 'lists' page:

I used the skinny washi tape to create my top 2 sections, then the ice cream and pineapple washi was too perfect not to use for my meals section.  My check boxes are a little messy (as is my writing) I need to buy some of those little stencils I think.

Thanks for stopping by

Morgyn  xx


Tuesday, 12 December 2017

Lisa - December Kit - Loving Summer

Hello, friends and welcome to my December layout blog. This month's Scrapping Fun Kit is full of bright Summer fun goodness. I love these colours and had the perfect photo for it, taken in the Aussie summer of 1996/97.


I started with a white 12x12 sheet of cardstock and layered some patterned paper I had in my stash across the middle. Then I layered two patterned papers from the kit a little right of centre and placed the photo on top. I haven't matted the photo in this instance as I thought there was enough going on and kind of wanted the photo to blend into the papers.

To the right of the photo, I have used all embellishments from the Kit. The blue diamontes and the "At the Pool" flair. Then in the bottom corner the blue lace flower and the gorgeous pineapple charm, which anchors the ribbon.


 To the left of the photo, I also used all embellishments from the kit. The beautiful frangipanis, sun flare and gold pineapple paper clip.

I am so upset though with the Tombow Mono Glue I have used to adhere the beautiful frangipanis. I guess I made the wrong choice of glue, maybe I should have used a fabric glue 😞

Across the top, I used the funky pineapple washi trimmed with the thinner blue patterned washi and the die cut printables like neon signs.

The Title is some lettering I had in my stash from Kmart and Reject Shop.
I have used the yummy ice cream washi across the bottom of the page also trimmed with the thinner blue patterned washi.

The ribbons from the kit have been used to embellish the bottom of the photo and to connect the right and left side embellishments.


Except for the glue fiasco on the Frangipani's I really love this layout and all its colourful summery goodness.


Monday, 11 December 2017

Lauren ~~ Summer Moodboard Challenge using the December Embellishment Kit

Hey Hey everyone,

Welcome back to another fun bright layout made with December Embellishment Kit.


this one is inspired by the moodboard picture >>>>

I loved the bright stripe looking colours up the top and it made me think of this stripey paper in the kit.

To add interest I attached to the 6x12 layout on an angle and used the excess that was cut off as corner pieces - making the background complete. This draws you eye from top to bottom of the layout.

The selfie was the other part of my inspiration - the flowers in my hair immediately called for some of the lovely 3D flowers that are in the kit and thats how the layout started.

I added the flower and the crotched leaf to top embellishment cluster on the photo. Backed the photo slightly with a torn card from a previous layout and wella!

Finishing the page off with a diecut (this is also the title) and some blue bling, a metal blue rose and a sequin. 

Looking at it then, I thought was missing something and was a little while before I realised it needed a border around the middle/photo cluster - so blue sharpie did the trick.

Here is the completed 6x12 layout. 


Thanks for visiting, check out the kits and join up to a subscription to ensure you get your hands on this awesome goodies.

Lauren.

Sunday, 10 December 2017

Sarah - DD Kit- Fiesta Fun!

Hello crafty friends, Sarah here with another Documenting December layout for you. Isn't the silly season upon us already?! I started writing this while travelling in the car to a work conference (until I got car sick!) and am finishing it off on Saturday morning - that's multi tasking for you! I'm trying to use my time as effectively as possible when ever I can. It just seems this time of year has less hours in the day perhaps!?!

This layout forms part of the 6x8 album of my 2016 Documenting December album - here's hoping I can get it done before Christmas this year, though it's coming up fast.

i have used a piece of patterned paper to create a large pocket across the bottom of the page. Washi tape across the top of this pocket and a photo of my boys matted on a pocket card layered on top of the pocket. Before I placed anything in the pocket, I added some paint to the top of the base page. I applied this Dylusions paints using my fingers, then once dried, stamped the word FIESTA on to it.
The FIESTA is an annual get together we have with close friends to celebrate Christmas. We all bring and shre food - hence the name, fiesta! I layered a tag, cut apart and photos within the pocket. This enabled me to still see all of these feaures with the option of hiding them in the pocket if I wanted to. The layout was completed using the gorgeous hand made flower from the Documenting December kit, some enamel dots from my stash and the number 17 from the kit - representing the 17 December when this event occured.
If you haven't already gotten your Documenting December kit, head to the Subscription Tab and fill in the form.

Friday, 8 December 2017

Christmas 2017 YouTube Hop - Childhood Christmas Memories


Scrapping Fun Kits is proud to be one of the five sponsors of the Christmas 2017 YouTube Hop and I (Raelene) am happily participating in this Hop with these lovely ladies.

The prize for this Hop's Prize Draw is a DD Kit.

To enter watch each video in the Hop and leave a commenton each video.


Here is the Hop order, start anywhere you like.
Suzanne
Raelene
Lauren WK
Katie 

Amy
Lauren H
Chrissi
Silvia
Morgyn

So now for my layout.

I wanted to Alter a Little Golden Book to use for recording my Childhood Christmas Memories.

The DD Kit was perfect for decorating the cover.
Those resin deer are super cute.

Head to my video and check out how I created this and how I Google is helping me record my memories.


Good luck to everyone who enters.

Thursday, 7 December 2017

Morgyn ~ Travellers Notebook ~ You're 6 Now


 Good morning Scrappers,

Morgyn Here sharing my latest Travellers Notebook spread using the current Scrapping Fun Kits TN kit (you can grab one here).  I am scrapping a photo of my son on his 6th birthday, this was his 3rd cake to celebrate - family, friends, more family = LOTS of cake hehe.


The dot paper I used on this page was my favourite piece from the collection and thought it suited a birthday cake layout. I used a tag from the kit along with the frame label sticker (how cute are those?) to create a base for the large #06 sticker which was from the basic's kit.  I trimmed down 3x4 card to create a little journal spot at the top.


For this page I used this beautiful gold floral paper as my background as it suited so wonderfully with the gold dot piece.  I used the Rhonna Designs app to make a polaroid style frame around my photo.  I used the green chevron washi tape from the kit as a little accent on this page (+ some more on the other side to match).  Using the roller stamp from the basic's kit I added the date and called this one done.  I think this little spread took me about 20 minutes and was lots of fun to make.


Here is a look at the finished 2 page spread.  I love how it turned out, the TN kit from Scrapping Fun Kits match together so well it's easy to put a layout together in no time.

I would love it if you would check out my process video for this layout, you can find it here.


Thanks for stopping by

Morgyn  xx

Wednesday, 6 December 2017

Morgyn ~ December Daily ~ Making the numbers


 Hi everyone,

I'm back with a little project for my December Daily.  This time I am sharing how I created my little number clusters.

I knew I didn't want to just stick the number on the page, that they needed a little bit of oomph so I decided to make some little clusters using pieces from the kit (which you can get here) and some bits and pieces from my stash.


Here I am using a piece of pattern paper from the kit, which I punched out using small tag, square and ticket punches.  I used these to created the base for my clusters.  Then I trimmed down some die-cuts from an old Kaisercraft 6x6 paper pad and add them to the base pieces.  Next I adhered my numbers to the top.


For this little one I used another die-cut from a Kaisercraft paper pad, it's meant to be an arrow but I thought it looked a little like a Santa Cottage.  I added some of the kit washi tape to the bottom and then the red number 2 on top.

I continued with similar combinations until I got to number 25, using pieces from my stash, some from the kit and couple of new bits and bobs.  I really loved how they turned out and can't wait to get them in my December Daily journal.  Here is a snapshot of my final 25 pieces.


I do have a process video up on my channel I would love for you to check it out, you can find it here. Also don't forget to grab yourself a kit to create your own December project.

Thank you
Morgyn  xx

Tuesday, 5 December 2017

Lauren - December Kit - Nothing But Blue Skies


Nothing But Blue Skies.........

This beautiful bright December embellishment kit made it easy to create!

I started with that green spotty paper - its such a lovely shade of green.

A 4x6 bordered photo sat perfectly on top, and then having the embellishment kit sitting out looking pretty made it easy to choose items to embellish the 6x12 layout. 

Ripped a filler card in half and poked it in the top left of the photo (it says Nothing but blue skies.... (perfect phrase for this photo))

Ribbon and blue Twine wrapped around the layout beneath the photo - it is taped with washi to the back of the layout. 

Made a fishtail banner on the "sunshine smiles" banner and tucked it in beneath the ribbon. I then used tab punch to punch out a tab from the rest of the filler card from the top.

FInished off with a sprinkling of flowers (both metal and paper/plastic ones) and the sequins, the perfect match to the whole layout.

Thanking you, Lauren


Monday, 4 December 2017

Summer Moodboard Challenge - Design Team Layouts

Summer Moodboard

Scrapping Fun Kits is so excited to be sharing our second challenge, the duration of this one has been extended to 3 months so it goes for all of Summer to allow you plenty of time to create while enjoying your Holiday season.  
The Challenge is for Non-Standard Scrapbooking.  Make sure you read the rules in the Challenge Tab.

Design Team Layouts

To inspire you some of the design team are sharing photos of their finished layouts created using the Moodboard.

International Guest Designer Jarka created this cute Summer spread in her Traveler's Notebook.


Lauren has created this fun 6x12 inch layout using the December Embellishment Kit.


Raelene has created this cute layout in her Traveler's Notebook using the December Embellishment Kit and some bits from the TN Promo Kit and items that may be appearing in a upcoming kit.


Morgyn has created this fun layout using her Summer TN Kit.


We would love to see what you create with the moodboard.