Saturday 27 April 2019

Raelene - April 2019 Kit - ANZAC

Last year on ANZAC Day the boys and I spent the day exploring the Discovering ANZACs website and reading all the documents about my Grandfather and my Grandmother's brother, I really wanted to scrapbook these important stories from our family history but I just didn't have enough suitable supplies so I made some Watercolour Poppies that day and then started work on creating a ANZAC inspired kit. 


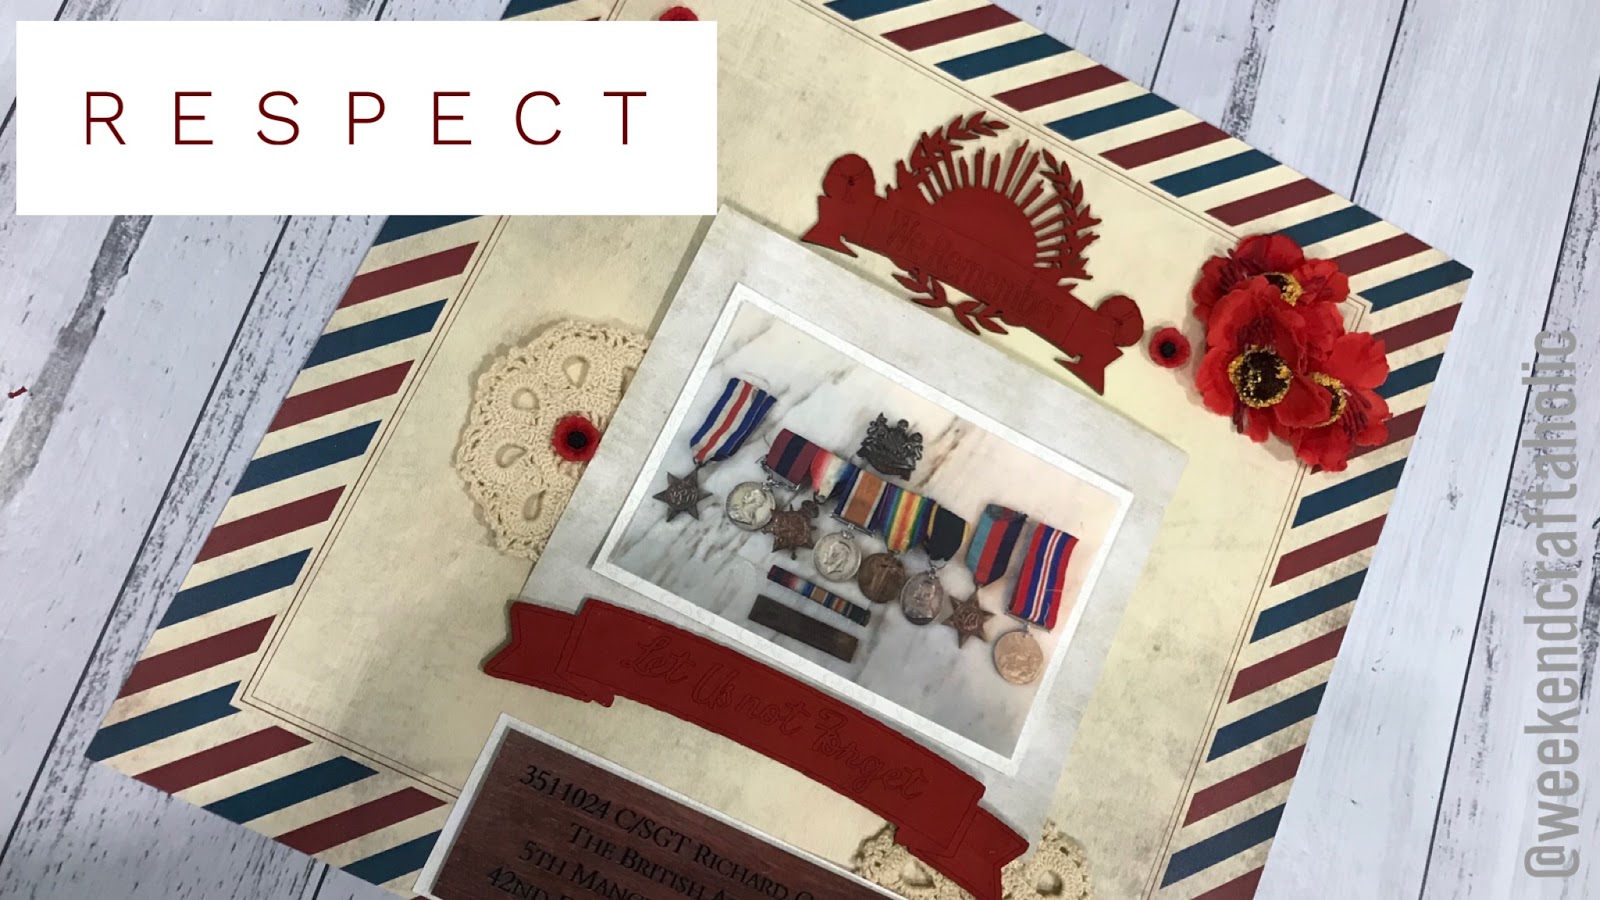
I scrapped the photo my Great-grandmother sent Grandad while he was stationed in France during WW1 earlier this month and on ANZAC Day I spent some quality scrapping time scrapping the restored photo of Grandad from WW1.

I started by aging my cream cardstock with Distress Ink in Antique Linen and Vintage Photo, I also edged all my paper layers and my photos with Vintage Photo.


I started by playing with my papers until I was happy with my layers, trimming out any paper that would be behind things and adhering them together with Helmar Acid Free Glue.  When sticking them down I didn't glue to the edge so that I could tuck things in later.
I wound up tucking in some Fundamentals white paper doilies later as once my embellishments were going down it felt like it needed it.

I stepped a little further outside my comfort zone and created a big field of poppies with all my Watercolour Poppies, the fabric and resin poppies from the kit and the poppy washi from the kit.  I usually don't do a cluster of flowers this big but I do love my poppy field.


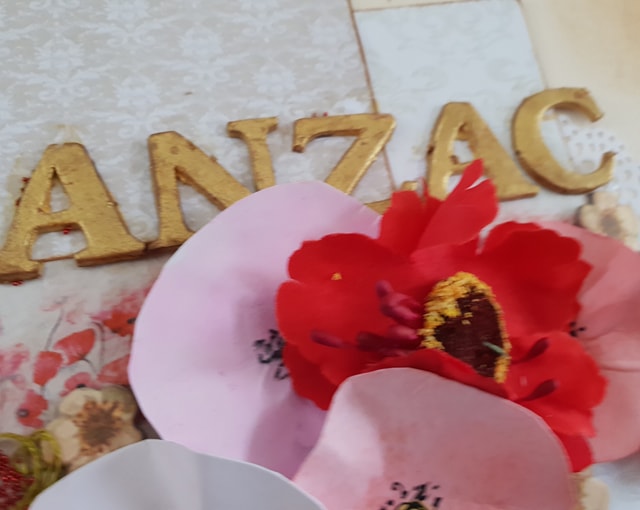
I started by sticking down some of the poppy washi and then sticking down all my watercolour poppies.  I then added my poppies and the leaf die cuts from the kit.
And finally added 2 wood veneer clock faces and some chipboard flowers and swirls from a old pack of Basic Grey chipboard.

For my title I grabbed out the letters for ANZAC from some Ruby Rock-It chipboard alphas and painted them with some gold paint. 
Once dry I inked them with Distress Ink in Vintage Photo to create a more brass look.


I added some scraps from a vintage crochet doily to my layout with Helmar 450 Quick Dry Adhesive (I used this for the wood veneer clocks and the resin flowers also) and some green embroidery thread. 
I placed a piece of the vintage doily in my top left cluster and into my main cluster, carefully poking it under flowers so it looked like it belonged in the cluster rather than being added as a after thought.


I added some Ruby Rock-It red micro beads to my cluster by just dabbing a little Helmar 450 Quick Dry Adhesive in random spots.


I added some paper scraps and washi to my top left and bottom right corners to draw your eye.

 I was so worried while I was building this layout as I do not usually do a big flower cluster but I absolutely love how it turned out.

Wednesday 24 April 2019

Karen - April 2019 Kit - That's Why I Craft


April 2019 - That's Why I Craft

I've had this quote for a while and had been meaning to scrap it for a while. As it was 6 x 4, it was too big for my pocket page notebook, and too small for a 12 x 12 - so I used my 8 x 8 album which has been neglected for some time.

I had some red cardstock, but apart from that, everything else I used was leftover from the Anzac inspired kit - and I still didn't manage to use everything!


I started layering the quote with some of the leftover paper, ripping it and layering it to give the quote a good focus point on the layout.

I knew I wanted to make a focus of the ribbon too, and decided to stitch on my sewing machine, to add some texture to the layout.

The intricate die cuts were an easy fit to this, and added some much needed contrast to all the red in the spread, adding a pop of green and brown.


I decided to add a few rows of stitching to the top of the layout too, to compliment the stitching at the bottom and to balance out the layout, which was started to feel a bit bottom heavy.


I love the end result of this - everything works so well together - without taking anything away from my quote. If you want to see how this came together, check out my video on YouTube here.

You can also find me on the following social platforms at:

Saturday 20 April 2019

Amy- April 2019 Kit - Art Journal Page

Hey Scrapping Fun Fans,.

Amy here and today I am sharing an art journal page with you that I created with the ANZAC inspired KIT, which really is all about imagery for me.

Personally I do not have alot of ANZAC photos to scrap,but the day means something to me as my grandfather and great grandfather was part of the wars, so when coming up with something for my 2nd project I wanted to represent what the day meant to me.


I had in my head the words at the going down of the sun, and the lovely doily from the kit reminded me of the sun so I knew it would be on my page. I had an image of the battle fields and the poppies as well in my mind as well, so I grabbed some of the Colour Blast paste in leather and that would represent the dirt of the fields. I used some of the text patterned paper just to add that vintage look as well as the telegram feel families would sadly get back in the wars.
I also added some of the washi from the kit to pop in the poppies to my 'field'.


I coloured the chipboard piece from the kit and added it plus the tower cut out and hat charm to the centre of the page as a focal image.
I then sprayed some yellow mist in the background at the top to represent the sun and placed my doily in the right corner. I wrote a little quote on another piece of torn patterned paper from our kit.
To finish the page off I used a gold paint pen just to write ANZAC day at the top of my page and the splatter some green ink splatters and then my page was completed.


I felt such a sense of pride completing this page and am really happy with how it came together.
You can see my process video over on my channel here
https://youtu.be/89Av8nzQe9Y

If you would like to order a kit head to the Subscription Tab and fill in the form, enter ANZAC in the promo code so Raelene knows which kit you want.

Until next time
Amy

Wednesday 17 April 2019

Julie - April 2019 kit - 60

Good morning Scrapping Fun Kit people

Today I am sharing the second layout I have created using the Scrapping Fun Kit's April kit.

The first one I created was We Remember. You can see that video here

Today's layout features a photo of me taken on my 60th birthday. I have to admit, it is very rare that I scrap a photo of myself.

You can watch the process video for this layout here.


I have used a Doodlebug Design flocked cardstock for the red background. I have cut the centre out of this cardstock leaving just a 1" frame as it seemed such a shame to waste it.

The black cardstock was cut to 11" square and the white cardstock is 10.75" square.

I used some black acrylic paint to colour some clear texture paste. I then put this through Kaisercraft's Lattice stencil down the middle of the page and to the left. I also added a small amount to the right hand edge of the cardstock.

I used the ribbon from the kit and a strip of black cardstock and some of the red to add some stripes behind the photo. I also added some of the ribbon on top of the texture paste on the right hand edge.


The two doilies, also from the kit, were added to the layout using my hot glue gun.

I used some of the patterned papers that I had left from the kit to make a couple of light coloured flowers to add to the red poppies to create a flower cluster on the bottom right of the photo. I also included the resin poppies and the green foliage to the cluster.


To complete the cluster on the right hand side I added one of the fabric poppies and one of the resin poppies to the doily


I cut my title using Die-Namics High Rise Numbers die and black cardstock and wrote the date by hand.

Lastly I added some splashed using Tattered Angles Chalkboard spray in Tomato Cerise.

Pop over to my YouTube channel and watch the video for all of the details.

If you would like to subscribe to Scrapping Fun Kits monthly kits you can do that here.

Thanks for dropping by
Till next time
Hugs
Julie

Saturday 13 April 2019

Julie - April 2019 Kit - We Remember

Good morning Scrapping Fun Kit fans

Today I want to share with you my first layout using Scrapping Fun Kits April 2019 kit. You can subscribe here

The kit has an ANZAC theme so I have created a layout showcasing my fathers National Service. He was in the first National Service call up.

There is a video showing the process for creating this layout on my YouTube channel. You can see it here.

Anzac layouts are the one time I feel comfortable putting flowers on a male layout because of the association poppies have with Anzac.


My background incorporates three layers of cardstock. The deep red, the kraft and the khaki.

I have used some brass acrylic paint to paint the chipboard emblem from the kit and also to colour the  paste I have used through a Kaisercraft stencil to add some dimension to the background.
When the texture paste was dry, I distressed all of the edges then I have used my sewing machine to attach the top two layers to the base layer with both straight stitching and zig zag.


I have used Stampendous Pretty Poppies stamp and die set to create the poppies. I have stamped the flowers onto red cardstock and then heat embossed them with fine black embossing powder. I did the same for the leaves using some of the same paper I used as the top layer of the background.

I love the Stampendous stamps and dies because when you cut the stamp out using the die it does not leave a border around the stamped image. I am not a fan of the borders I'm afraid.


I used the patterned papers in the kit to cut some fishtail pieces of various widths and lengths to layer behind my photo. I also used a piece of red velum that I embossed using a Cuttlebug embossing folder as another layer.

I had my father's badge, so I cleaned it up and attached that using my hot glue gun so it would stay in place. The slouch hat and clock metals that were in the kit, are attached with black crochet cotton so they hang just below the photo.


The journalling was printed onto some of the patterned paper from the kit and attached with double sided tape.

Once I had matted the photo on the same paper as the top layer on the background I used foam tape to attach it to the layout


Don't forget, you can watch the video showing the process of creating this page on my YouTube channel here

Thanks for dropping by
Till next time
Hugs
Julie

Wednesday 10 April 2019

Raelene - April 2019 kit - Message from home

Ever since I attended my first scrapbooking class one of the most important things I planned to scrap the heritage photos and in particular I wanted to tell the 2 ANZAC stories in my family.

So when creating this ANZAC inspired kit for my business Scrapping Fun Kits I thought about what I needed to tell the story of my Granddad and my Grandmother's brother.
For this layout I am scrapping a copy of the front and back of the photo my Granddad's Mother sent him when he was serving in France, dated 22/2/1917.  This is the only photo in existence of his Mum and the only example of her hand writing so it is very special and I am so glad I was able to get a scanned copy on a visit to my then 88 year old Uncle in 2009.  I was going to include the photo of my Granddad but changed my mind during the creation process.


I wanted to create a aged paper look with my cardstock so I started with a sheet of cream cardstock and created the aged feel with Distress Ink in Old Paper, Antique Linen and Vintage Photo using the packaging technique on my craft sheet and then some ink blending to finish to accomplish this.
I then sealed it with Helmar Chrystal Kote to ensure if it got wet I  wouldn't have my ink run.


I then grabbed out the lace from my August 2018 Mary Poppins inspired Kit from Scrapping Fun Kits and aged it with some Distress Ink Aged Linen, I just dabbed it several times on my craft sheet, spritzed with water and then smooshed my lace in it.

To put my layout together I used 3 papers from the kit and selectively cut the papers so I could save the paper that would be behind the photos.
I matted my photos with cream cardstock and inked the edges of the photos and the photo matts with Distress Ink Vintage Photo.
Adhering all my layers with Helmar Professional Acid Free Glue.


I put down a strip of the washi from the April 2019 ANZAC Kit, then adhered my lace using Helmar 450 Quick Dry Adhesive.
Once this was down I glued my photo cluster down with Helmar Professional Acid Free Glue and then started adding the charms and 2 of the die cuts from the ANZAC Kit.
I used Helmar 450 Quick Dry Adhesive to adhere the charms and Helmar Acid Free Glue to adhere the die cuts.


I decided to just put my Great-Grandmother's name as my Title so I grabbed out some really old Kaszazz alphas that look like handwriting and spelt out her name, I chose this as I wanted it to work in with her hand writing.
As I was sticking it down I realised I was putting down her maiden name so added her surname but I was out of y and s  so I had to make them by cutting other letters and numbers up.  I created the y with a u and the bottom of a 3 and the s were created with the bottom of a 3 and top of a 2. 
I think they look pretty good.


Scrapping family heritage photos can be really hard but I am really happy with how this turned out.

Saturday 6 April 2019

Karen - April 2019 Kit - Respect

Hey, thanks for stopping by.

This is my first blog for Scrapping Fun Kits and I feel lucky having this kit as my first one - it's stocked full of inspiration!


My thought was to document the story of my great-great Uncle who fought in both World Wars. Whilst our heritage is English, I still feel a connection with ANZAC as he fought at Gallipoli from May 1915 to January 1916. I've outlined below some info we were about to find from the National Archives. Of course my title would have to be, quite simply, Respect.


Richard Gregory - born in 1886.  He joined the army before the first world war started. He was a grocer before becoming a soldier.  He joined the:
1/5th Battalion The Manchester Regiment (Territorial Force) which formed 127th brigade and the 42nd East Lancashire Division. Mobilised at Wigan 4 August 1914 and set sail on the 10th September sailed from Southampton for Egypt, arriving Alexandria 25 September 1914.
To Gallipoli 9 May 1915 (Krithia - June 1915. Achi Baba Mullah & Krithia Vineyards - August 1915)
Withdrew from Gallipoli on 9 January 1916. Over 14,000 men served in this division, only 4,000 returned alive. His medals for the World War I campaign (from left to right) are:
 
Distinguished Conduct Medal:
He was allowed to use DCM after his name for being awarded this.
1914-1915 Star: 2 million of these were issued, and they were issued to men who served in a theatre of war before Dec 1915.  Richard received his for fighting in Egypt and Gallipoli.
British War Medal: 6 million issued, and everyone who left Great Britain received one of these, issued at the end of the war.  Made of silver, so a lot of these were sold by soldiers or their family, as money was scarce after the war.
Victory Medal: 5 million issued, again only for soldiers who saw active service. These were issued at the end of the war.
Territorial Efficiency Medal: Issued after 12 years active service.
The 3 badges in the middle were referred to as Pip, Squek and Wilfred - as there was a cartoon in the national newspaper at the time of the war by this name.  Most men that saw active service received the British War Medal (middle one) and the Victory Medal (brass on the right of middle) and these were known together as Mutt and Jeff. 
 
He began his service as a private, then moved up to corporal - which meant he was in charge of a section of men. Lastly he was promoted to a colour sergeant before the end of WW1. A colour sergeant is a non-commissioned rank - and the highest rank that can be given to a 'non-educated' soldier.  Historically, Colour Sergeants of British line regiments were tasked with protecting Ensigns, who were responsible for carrying their battalions' Colours (flag or insignia) to rally troops in battles. For this reason the Colour Sergeant rank was considered a prestigious one given normally to courageous Sergeants who had attained accomplishments in battles.  Richard survived WW1 and went  onto serve in WW2, earning another 4 medals - but that's another story!

I was able to use half the supplies in the kit, and only added a 12x12 scrapbook sheet in from my stash. I chose this because I liked the way the edges reminded me of design of long distance airmail envelopes from yesterday. It also tied in perfectly with the 5x7 sheets in the kit.

My first plan was to colour in the chipboard pieces with some acrylic paint. They came out a bit brighter than I expected, as I wanted to tie in with the paper, but they do match the flowers quite well, so I'm happy with the end result.

As well as having a couple of photos as my theme for the layout, I also had a copy of his Record of Service I wanted to keep with the layout, so I decided to use one of the 5x7 sheets of paper as a placeholder.


I used the paper sheets as borders for the photos, as well as adding foam to the back of the plaque - this is a photo from the jarrah box that I had made to keep the medals in.

After that, the layout came together really easily, the resin poppies and crochet worked so well and I love the texture these bring to the layout.


I was aiming for a bit of old-world charm as well as a sense of formality in the placement of these pieces, which I hope I've conveyed in a respectful way as appreciate for the contribution and sacrifice made by many.


If you'd like to see how this came together, a process video is up on my YouTube channel or you can find me here at WeekendCraftaholic

Wednesday 3 April 2019

Amy- April 2019 Kit - Mixed Media Layout

Hey Scrapping Fun Fans,

Welcome back to a new month and a brand New Kit to play with! I decided to really go all out with the mixed media to kick off this months projects and I used Kraft cardstock instead of white just to change things up a bit.

I used scribble sticks in a red, blue and purple colour and added water to them to create a wash colour across the back ground (after clear gessoing the paper first). I then added the white and copper coloured texture paste through the circular pattern stencil to add some texture and more interest to the background.


I then added some patterned tissue paper from stash to add some softness around my photo, followed by thin borders of the papers from the kit at the top and bottom of the photo. I then also added a strip of washi and the cut out leaves from the kit to the bottom of the photo.


I wanted to add some of the little sweet embellishments from the kit as well, so created so little pops of clusters using the little red poppies, the metal charms and resin flowers from my stash.


I also created a larger piece in the top left corner using the crochet doily.


Next up was grabbing some thickers from my stash to work on a title, which I used these travel typed theme ones, why not we were on a train ;)
And that is the layout done.


Thanks so much for tuning in and I will see you again soon ;)