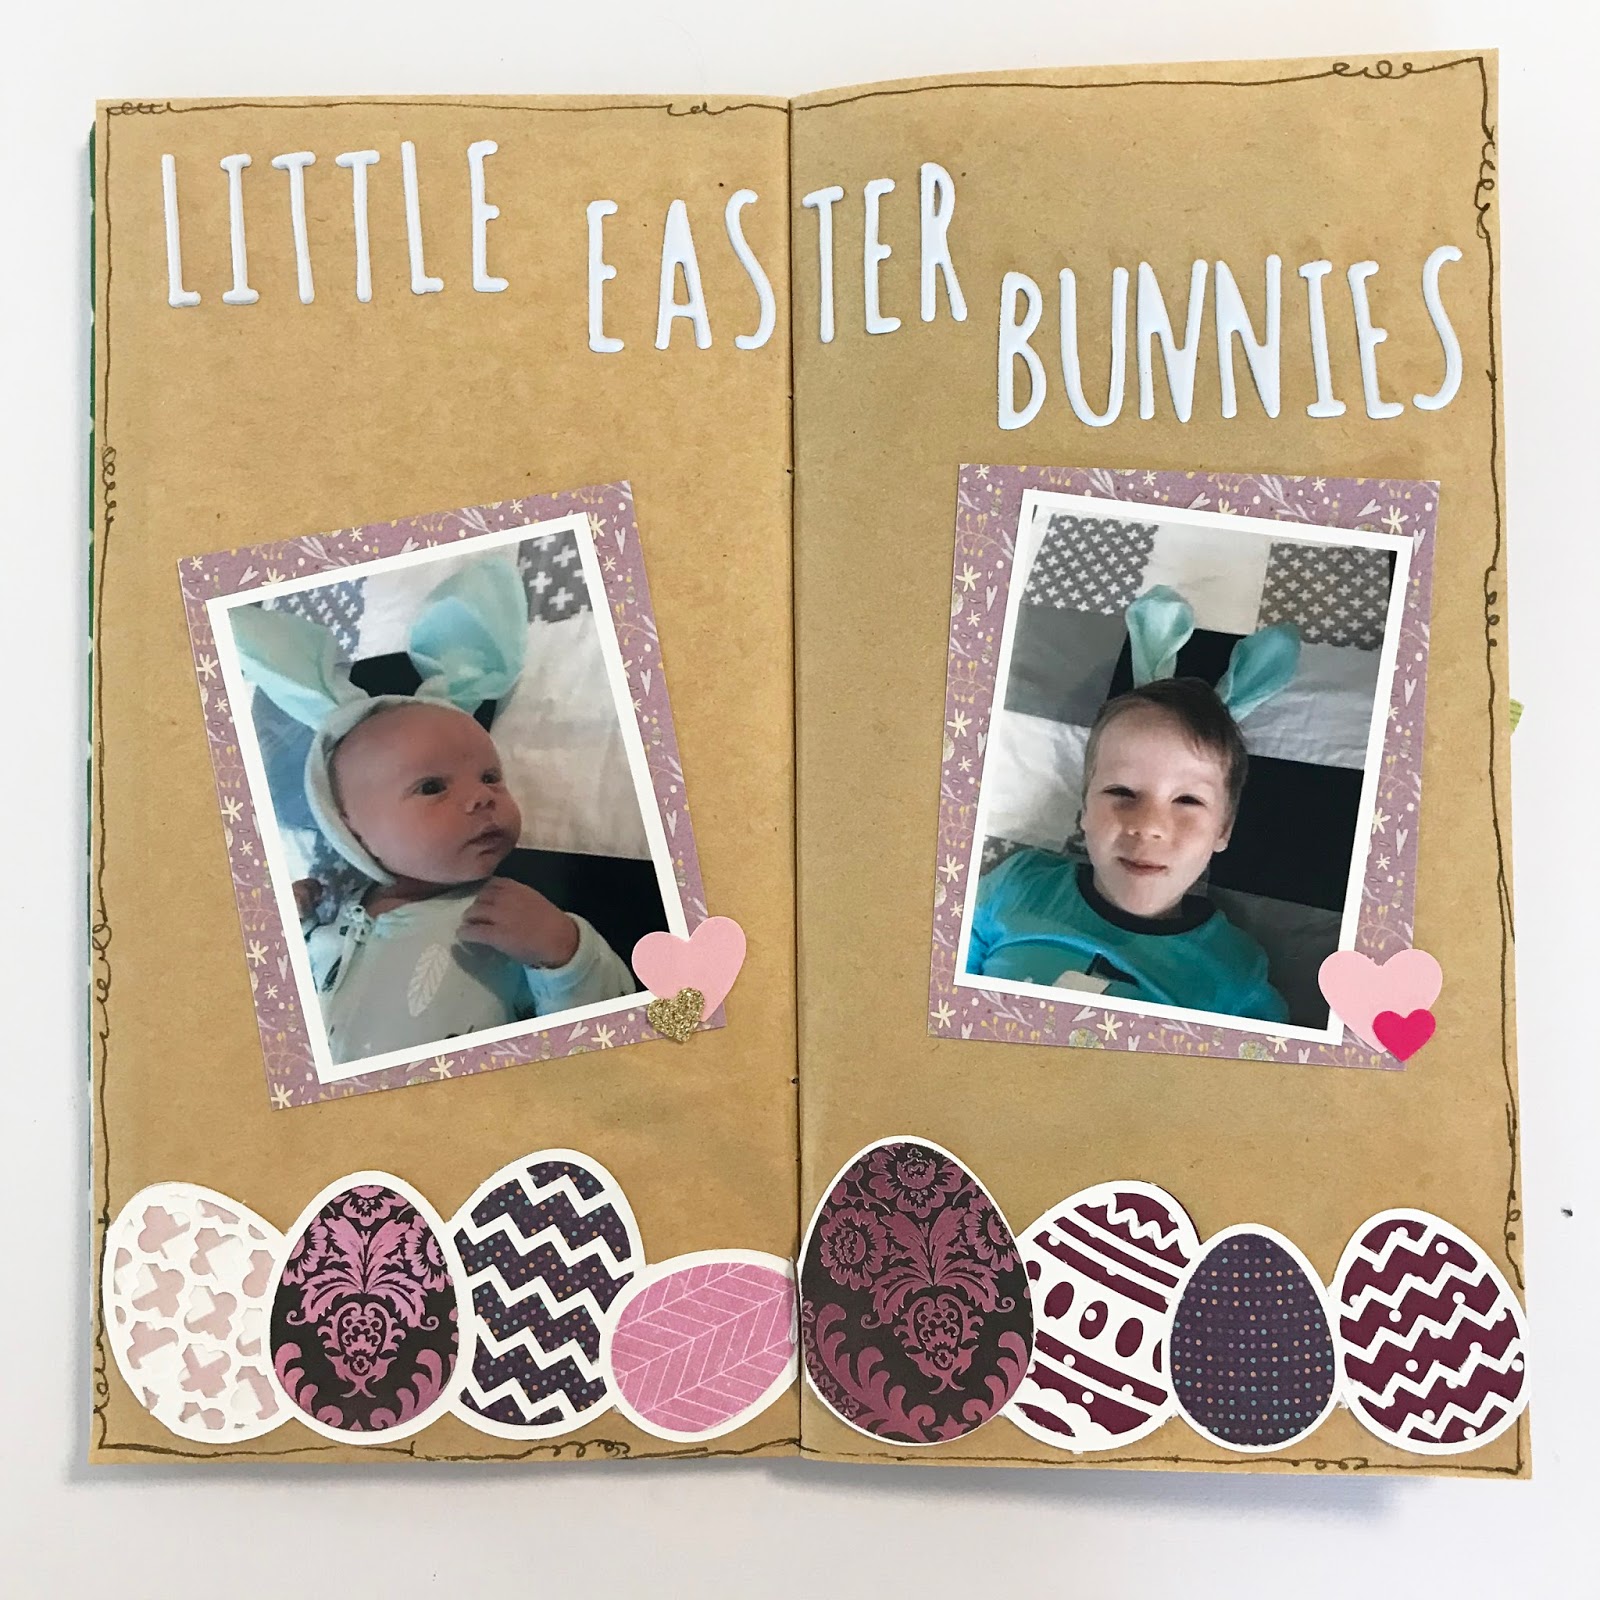
Today I am sharing my layout for the Easter Moodboard.
I decided to scrap photos of my boys with their eggs from a few years ago.
I started by using 2 of the papers from the March Embellishment kit to create some layers across my Kraft TN Insert from the Basics Kit, ten added the photos to the purple egg paper.
I added the bunny washi from the March Embellishment Kit and this lovely autumn feeling washi from the Autumn TN Kit to the top and bottom of the layout so there wasn't so much brown showing.
I then added words from the cut apart, eggs fussy cut from the journal card and the gorgeous bunny charm to finish off my layout.
This was a very quick layout to create which was really important as I only had 20 minutes of craft time on the day.
Here is the March Embellishment Kit, that I used for majority of this layout.
There are still a couple of these kits available so if you would like one head to the Subscription Tab and fill in the form. Enter March in the promo code box so I know you want a March kit.
If you would like to enter the Moodboard Challenge just head to the Challenge Tab for details.
Showing posts with label basics kit. Show all posts
Monday, 9 April 2018
Thursday, 5 April 2018
Sarah - Autumn TN Kit - Colour My World
Hello crafty friends, Sarah here with you using the amazing Autumn Travellers Notebook kit from Scrapping Fun Kits. The washi tape in this kit is amazeballs! I just had to use it on this layout about my oldest son.
Scrapping Fun Kits have released this Autmn TN kit and I must say, it is so generous!! The amount of embellishments, tags, paper and washi it fantastic!! On the right hand side of this TN page I adhered strips of the washi tape, slightly overlapping each of them. I then mounted my photo on a piece of the patterned paper in the kit, tearing it at the bottom to give some texture. On the left hand side, I also applied some of the washi tape, cut the round tag and the the cut apart 'family time' and layered these together.
I stamped on the background using various background stamps, then adhered some of my painted deli paper with gel medium. When using gel medium to adhere deli paper, it gives a translucent effect. Using the letter stickers in the kit, I created the title 'You Colour My World'.
I hope you enjoyed this layout and will be quick to get your TN kit from Scrapping Fun Kits.....it's got many, many layouts in it!!
Scrapping Fun Kits have released this Autmn TN kit and I must say, it is so generous!! The amount of embellishments, tags, paper and washi it fantastic!! On the right hand side of this TN page I adhered strips of the washi tape, slightly overlapping each of them. I then mounted my photo on a piece of the patterned paper in the kit, tearing it at the bottom to give some texture. On the left hand side, I also applied some of the washi tape, cut the round tag and the the cut apart 'family time' and layered these together.
I stamped on the background using various background stamps, then adhered some of my painted deli paper with gel medium. When using gel medium to adhere deli paper, it gives a translucent effect. Using the letter stickers in the kit, I created the title 'You Colour My World'.
I hope you enjoyed this layout and will be quick to get your TN kit from Scrapping Fun Kits.....it's got many, many layouts in it!!
Monday, 2 April 2018
Morgyn ~ Little Easter Bunnies ~ Easter Moodboard Challenge
Hey Scrappers,
Morgyn here with my take on the latest moodboard challenge over at Scrapping Fun Kits.
This is such a awesome mooboard, mainly because I love purple and of course the adorable billbies.
I decided to use my travellers notebook for this layout, if you haven't given this size a go, do yourself a favour and grab one (you can get this one in the basic's kit) it's really fun to work with.
I knew the perfect photos to document for this layout, my 2 little bunnies from Easter 2017. Roman was only 5.5 days old and so tiny. I used the purple paper from this months Scrapping Fun Kits Easter kit to mat my photos (it's the same paper as in the moodboard... too perfect 👍)
I designed this little eggy boarder in Silhouette Studio then cut the white part out of cardstock and all the little eggs from some scraps of purple and pink paper (I love finding ways to use up scraps).
*I will leave a link to silhouette file below*
I found a whole sheet of heats in my stash and used them as some little photo accents. Then added in my title using this super cute puffy alphas, before finishing off the page with a doodle boarder.
Click here to grab yourself the Silhouette file for the eggy boarder
You can check out my YouTube Process video here.
Thanks for stopping by
Morgyn xx
Thursday, 29 March 2018
Morgyn ~ Autumn TN Kit ~ An Autumn Day
Hi Scrappers,
Sharing my latest travellers notebook spread with you today. I am using my Kraft notebook from the Scrapping Fun Kits, basic kit and the Autumn Travellers Notebook kit.
I started with the green and purple piece of paper for my background and built the rest of the page up around that. I cut out the arrow die-cut then used the kit alphas for the 'notes' label.
I matted my photo with the red die-cut piece. I popped a tag behind the photo for my journaling, using the kits washi tape along the bottom of the page to fill in the gap of the smaller paper.
On the left side of the page I added the red boarder strip to match the red mat behind the photo.
To finished off the page I added a couple of circle embellishments.
This page together so easily and only took 15 minutes, it helps that the kits are so nicely coordinated.
IF you would like to check out my process video you can find it here and if you would like to subscribe to Scrapping Fun Kits you can follow the link here.
Thanks for stopping by
Morgyn xx
Monday, 12 February 2018
Raelene - Summer Moodboard - Sandy Toes
Today I am sharing my layout for the Summer Moodboard.
I used the December Embellishment Kit and some bits from my stash
I started by selecting 2 papers from the December Embellishment Kit and cutting them to fit the the TN pages.
Then I added a border sticker from a upcoming TN Kit to give some extra texture.
Then I added my photo and started embellishing with washi bits from my stash.
I decided to scrap a gorgeous photo of my Mr 11's feet when he was about 2 or 3 years old and we were at the beach. All electronic storage that the photo was stored on was damaged so I no longer have the dates of the photo and have to guess his age.
I accidentally tore my paper a tiny bit so covered the tear with a flat enamel dot and well I couldn't have just one enamel dot randomly on my layout so I added 5 more on the layout.
I love how the layout turned out, it is very cute and feels very summery even though the photo was taken on a overcast day.
I used the December Embellishment Kit and some bits from my stash
I started by selecting 2 papers from the December Embellishment Kit and cutting them to fit the the TN pages.
Then I added a border sticker from a upcoming TN Kit to give some extra texture.
Then I added my photo and started embellishing with washi bits from my stash.
I decided to scrap a gorgeous photo of my Mr 11's feet when he was about 2 or 3 years old and we were at the beach. All electronic storage that the photo was stored on was damaged so I no longer have the dates of the photo and have to guess his age.
I accidentally tore my paper a tiny bit so covered the tear with a flat enamel dot and well I couldn't have just one enamel dot randomly on my layout so I added 5 more on the layout.
I love how the layout turned out, it is very cute and feels very summery even though the photo was taken on a overcast day.
Thursday, 8 February 2018
Sarah- TN Kit - 'Hi'
Hello crafty friends, Sarah here with a Travellers Notebook layout for you using the Scrapping Fun TN kit.
For this layout I was inspired by 'Love to Scrap On's Traveler's Notebook monthly challenge, as pictured below.
For the background page of this layout I used the most gorgeous pink floral vellum from the TN kit. The black and white polka dot tag was a lovely contrast to the paler background. This was cut in half (with a little more cut off to add to the top right hand corner) and positioned behind my photo. The chipboard 'Hi' I inked black and added some of the cut out roses for embellishing.
The Autumn TN kit will be released soon - keep your eye on the Facebook page for more information as it gets closer. Alternatively, to get ready for the launch of the TN kits by Scrapping Fun, you can sign up to subscribe by clicking here.
For this layout I was inspired by 'Love to Scrap On's Traveler's Notebook monthly challenge, as pictured below.
For the background page of this layout I used the most gorgeous pink floral vellum from the TN kit. The black and white polka dot tag was a lovely contrast to the paler background. This was cut in half (with a little more cut off to add to the top right hand corner) and positioned behind my photo. The chipboard 'Hi' I inked black and added some of the cut out roses for embellishing.
The Autumn TN kit will be released soon - keep your eye on the Facebook page for more information as it gets closer. Alternatively, to get ready for the launch of the TN kits by Scrapping Fun, you can sign up to subscribe by clicking here.
Monday, 22 January 2018
Sarah's Summer moodboard layout
Hello crafty friends, for this month's moodboard challenge, I loved the colours of the Summer moodboard. I did a Travellers Notebook layout for this one with a cute photo of my younger son showing off wearing his sunnies! Lets have a reminder of what the moodboard looks like;
Most of this layout was completed using the cut apart elements and cards from the December embellishment kit. I matted the photo on a crinkly, dotted paper bag I had in my stash and used a 'Happy Day' yellow frame to highlight his cheeky smile. The washi tape from the December kit is just adorable and is also featured on this layout.
To finish the layout off, I used a date stamp and some sequins to add some bling. I hope you enjoyed this layout. Until next time...
Most of this layout was completed using the cut apart elements and cards from the December embellishment kit. I matted the photo on a crinkly, dotted paper bag I had in my stash and used a 'Happy Day' yellow frame to highlight his cheeky smile. The washi tape from the December kit is just adorable and is also featured on this layout.
To finish the layout off, I used a date stamp and some sequins to add some bling. I hope you enjoyed this layout. Until next time...
Thursday, 18 January 2018
Morgyn ~ Summer Kit ~ Travellers Notebook
Hi Scrappers,
Morgyn here with my latest Travellers Notebook scrapping layout. I am using the Summer Travellers Notebook kit from Scrapping Fun Kits.
I took this photo of my 2 boys just the other day, while they were having a little paddle in the pool. It was a super hot day and the temperature had got up to 41 where we live, so the cool water was most welcome for all of us late in the afternoon.
For the left side of the spread I used this green & white polka dot paper as my base - it matched the colour of the pool perfectly. I added my title using the Alpha stickers from the kit along with a few others from my stash. My title 'One fish, Two fish, Red fish, Blue fish' is from Dr Seuss which is one of our favourite authors to read with the kiddies. I thought it was a perfect title for my 2 little fish.
I added some washi tape and embellishments to the bottom corner to finish off this side.
For the Right hand side of the layout I started with some painting the background with some orange/yellow Dylusions paint. Pure Sunshine is the colour name... to perfect for this layout right??
I added the summer paper piece and then my photo.
For the embellishments I used 2 bits of washi tape in the top right corner ('Monday' is from the basic's kit). The little fish sticker was a great addition to the page and suited the title very well.
I added the date and my journaling to finish off the page.
I love how this little layout came together in about 25 minutes. Travellers Notebook is the perfect size for documenting the little things quickly and easily, plus the Scrapping Fun Kits are so well coordinated it makes it even easier! Subscribe to get your own here.
I have a process video up on my channel if you would like to see how I put this together.
Thanks for stopping by
Morgyn
Monday, 8 January 2018
Morgyn ~ Summer Kit ~ Moodboard
Hi Scrappers,
Morgyn here with my take on the moodboard challenge (pictures below). You can find all the information on how to enter here.
I have once again gone with a travellers notebook spread for my layout - this is my favourite size to scrap with at the moment. I have used the current Summer kit for my layout .
I used this fun paper as my background piece and added just a couple of embellishments from the summer kit. The t-shirt sticker said Fun in the sun so I cut a sun piece of washi tape from the basics kit and added it to the shirt I also used the number 25 from the basics kit to add the date.
I really liked the rainbow gradient word from the moodboard and it was inspiration for my title. The fun multicoloured alpha set that came in the summer TN kit was perfect for this.
I printed a film strip of 3 photos from our day at Dreamworld making sure to use the photo of Sam eating his giant rainbow ice cream.... just so I could use the super cute Watercolour ice cream washi tape. Adding in a couple more little embellishments and calling this one done, nice and simple today.
Thanks for stopping by
Morgyn xx
Friday, 15 December 2017
Morgyn ~ December Kit ~ Weekly Planner Spread
Hi everyone
Morgyn here sharing how I am using this months embellishment kit.
I am using the kit to decorate my Travellers Notebook planner (you can see how I made it here). I use this as my weekly overview of whats happening and when. I love that the embellishment kit is so versatile that I can use it in my planner as well as use it to scrap with :)

Morgyn here sharing how I am using this months embellishment kit.
I am using the kit to decorate my Travellers Notebook planner (you can see how I made it here). I use this as my weekly overview of whats happening and when. I love that the embellishment kit is so versatile that I can use it in my planner as well as use it to scrap with :)
Here is this weeks spread:
This kit is perfect for this lovely summer weather we are having + my kids have been eating ice blocks like they are going out of fashion!
Here is a close up of the weekly spread:
I have used the roller stamp from the basic's kit to date my days of the week and the pineapple paper clip is a pretty yet functional embellishment to hold any little notes during the week.
A close up of the 'lists' page:
I used the skinny washi tape to create my top 2 sections, then the ice cream and pineapple washi was too perfect not to use for my meals section. My check boxes are a little messy (as is my writing) I need to buy some of those little stencils I think.
Thanks for stopping by
Morgyn xx
Thursday, 7 December 2017
Morgyn ~ Travellers Notebook ~ You're 6 Now
Good morning Scrappers,
Morgyn Here sharing my latest Travellers Notebook spread using the current Scrapping Fun Kits TN kit (you can grab one here). I am scrapping a photo of my son on his 6th birthday, this was his 3rd cake to celebrate - family, friends, more family = LOTS of cake hehe.
The dot paper I used on this page was my favourite piece from the collection and thought it suited a birthday cake layout. I used a tag from the kit along with the frame label sticker (how cute are those?) to create a base for the large #06 sticker which was from the basic's kit. I trimmed down 3x4 card to create a little journal spot at the top.
For this page I used this beautiful gold floral paper as my background as it suited so wonderfully with the gold dot piece. I used the Rhonna Designs app to make a polaroid style frame around my photo. I used the green chevron washi tape from the kit as a little accent on this page (+ some more on the other side to match). Using the roller stamp from the basic's kit I added the date and called this one done. I think this little spread took me about 20 minutes and was lots of fun to make.
Here is a look at the finished 2 page spread. I love how it turned out, the TN kit from Scrapping Fun Kits match together so well it's easy to put a layout together in no time.
I would love it if you would check out my process video for this layout, you can find it here.
Thanks for stopping by
Morgyn xx
Wednesday, 15 November 2017
Sarah - TN Basics Kit - In Any Kind Of Weather
Here is what you will get in the kit;
For this layout, I used a photo of my husband and myself to celebrate our relationship and how we can go through 'any kind of weather' and still be strong. I was attracted to the 'weather' theme of the basics kit, though this layout just goes to show you dont have to go with the obvious intention of the kit contents. The YOU and Me was stamped from a stamp set I had in my stash.
I used the fantastic days of the week washi provided in the kit to highlight the vertical edges of the layout. The large ampersand is in the kit as well as the gorgeous cloud paper embellies. The stickers for the title are from the Design Team exclusive the kit and the small weather stamp from the basics kit was a nice finish to the layout, highlighting the title - 'any weather'.
As seen below, I layered some patterned paper with pocket cards on the left side, which using a tag that can be pulled out for my journalling. In this Travellers notebook style, I have vowed to include more of my own voice and journalling, though I still like to hide it a little, particularly if it is more private.
If you havent already, hurry to get your own Travellers Notebook basics kit - this is available until sold out. Thanks for joining me! Until next time...
Subscribe to:
Posts (Atom)