Wednesday 27 June 2018

Amy- June embellishment Kit- "Daddys Girls"

Hey Scrapping Fun peeps,
How are we all loving the beautiful June kits? I have to say I have killed this kit well and truly I have loved it that much, and this layout finished it off for me (apart from some washi left and I think a flower).
My layout today was inspired by this gorgeous photo of my partner with his two girls (my stepdaughter and our daughter) at a wedding earlier in the year , and I just could see this kit fitting so well with documenting this picture.
I used my SIlhoutte to make the quote cut file and backed it onto some pink glitter cardstock from my stash. Then using some pieces of the pattern paper from the kit I created 2 thin layers around the left top side of the cut file. I then matched that on the right side of the photo, creating 2 thin layers with 2 seperate pieces of patterned paper from the kit as well.

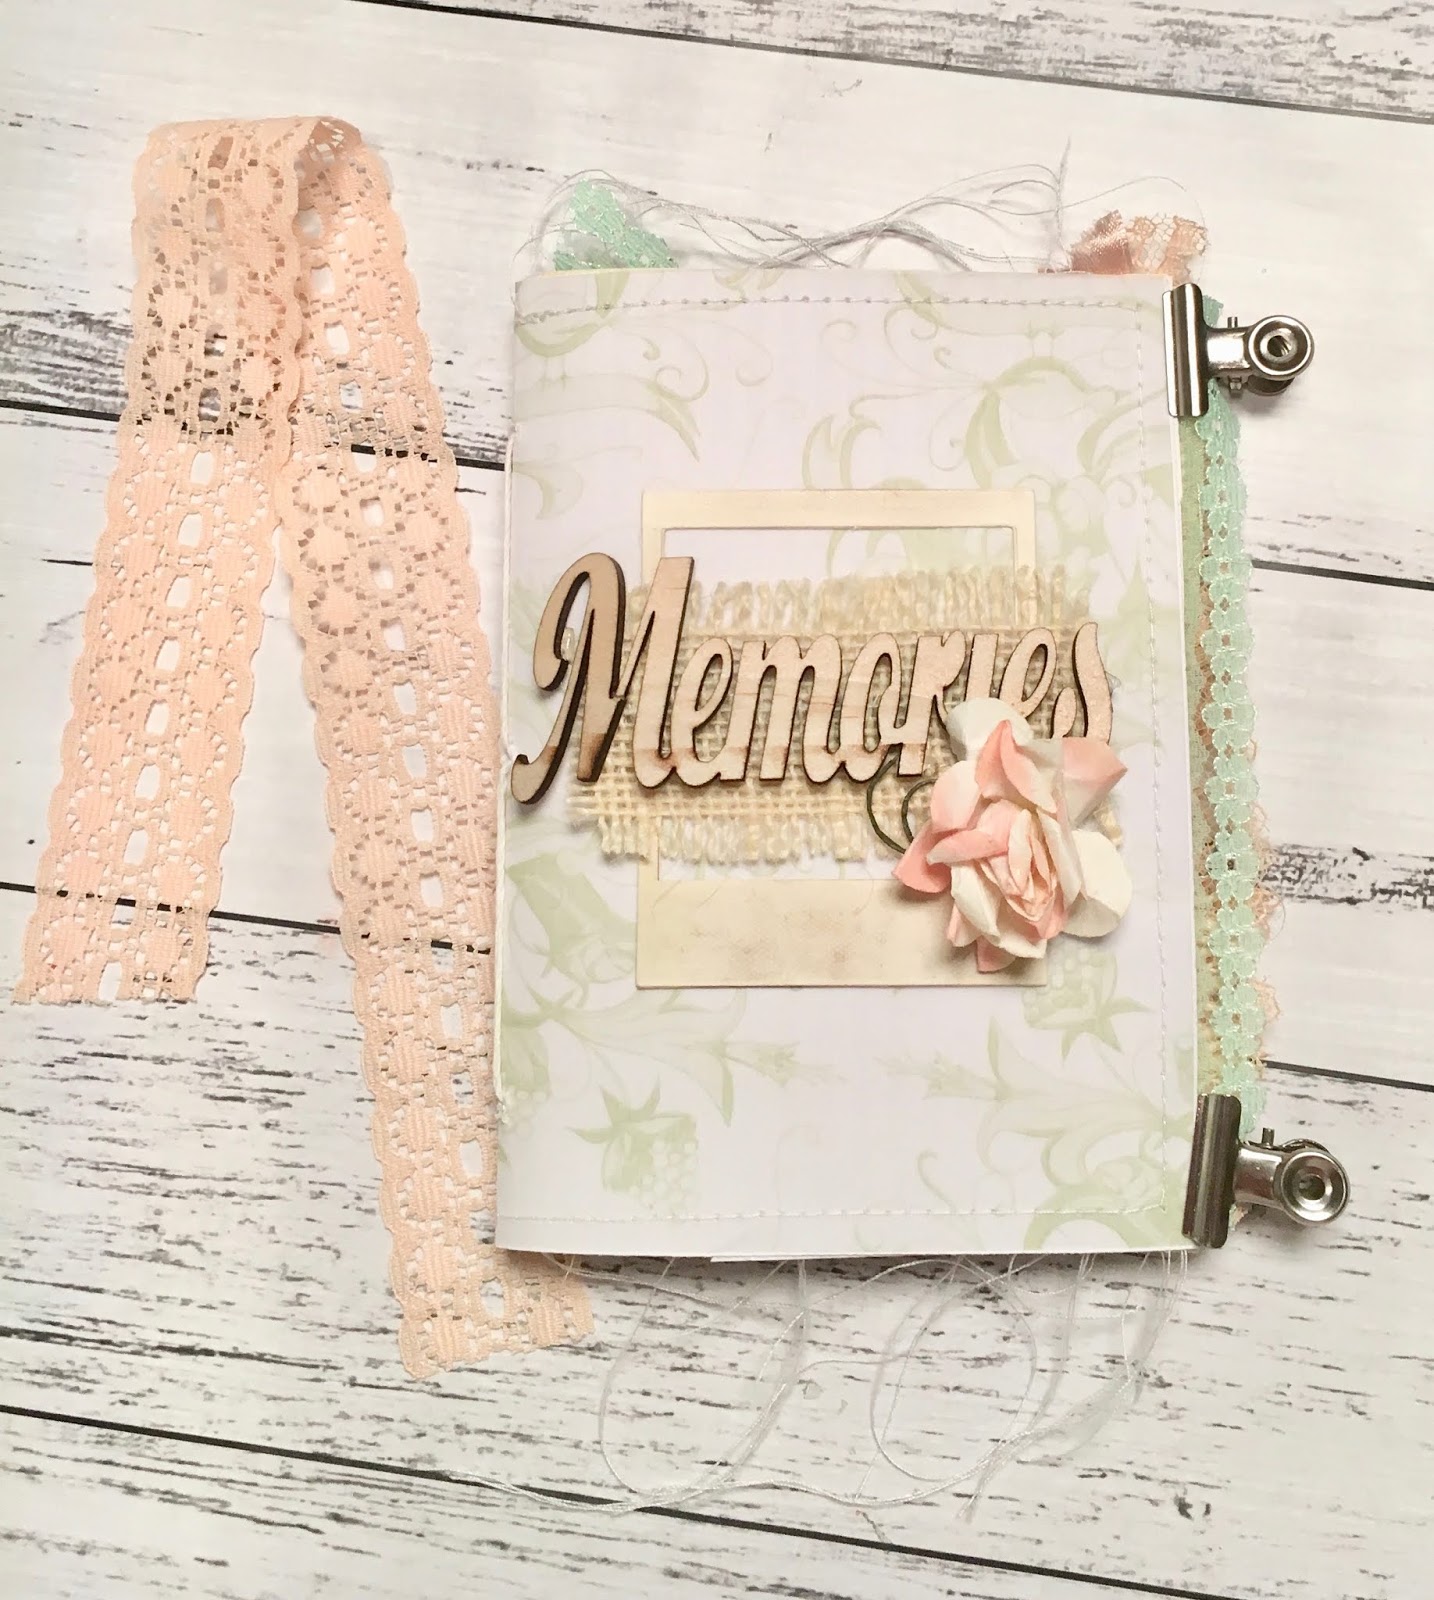
I then added the 2 pastel coloured lace ribbons to under the cut file and photo, to add a delicate type border and texture to the layout. I also added some small clusters with 1 around the wood veneer word Memories that was in our June kit and using a strip of the gorgeous floral washi and the resin flower and then to the left I used the green lace flower along with some phrase stickers from my stash to add some sentiments. 

To finish up my layout I added some small embellishment touches to the page using the flairs, washi , resin and then some little pieces from in my stash just to add some delicate touches. 
I truly loved how this layout turned out , with a nice hint of vintage beauty that this months kit really helped to add. 


Thanks so much for stopping by and see you next month with some more fun scrapping projects. 
Amy xx

Monday 25 June 2018

Connie - June Emellishment Kit!

Hello Arty Friends!!!

I am so excited to shared with you all what I have done with the June Kit!!
This kit is AMAZING! ... So many goodies.

I had already decided that I wanted to do something a little different this time, to show you how versatile this kit is!
Also I will have a little giveaway at the end!! ... SUPER  EXCITED!!!!

So I used the remaining supplies from the kit to make a personal Traveler's Notebook Junk Journal!
I have so much fun putting this together. I also included some dot paper, white paper, coffee dyed paper, vintage music paper and a couple of other things from my stash!

I have used the pamphlet binding to hold  it all together.


NOW!!! for the giveaway....

I will be giving away this Journal to one lucky Scrapping Fun Kits follower!
To be in the draw to own this one of a kins Journal, all you need to do is ...

*Leave a comment below
*Like Scrapping Fun Kits Facebook page & tag a crafty friend.
*Like my Facebook page & tag a crafty friend.

Entries close Saturday June 30 5pm AEST!

Thanks for stopping by!!!

Connie ...xxx


Saturday 23 June 2018

Jaymilee - June 2018 kit - Memories

Hi lovely ladies, I’m back on the blog today sharing my second layout using the June embellishment kit. Featured in this month’s kit was a beautiful wood veneer piece. I really wanted to use this piece as the focal point of this project.


To achieve this look I used just some washi from my stash to over the top half of the word. Next I mixed together some green paint with white to create a mint green colour and simply painted over the other half of the word. I really love how it turned out and it made the wood venner really pop on the page.


I’ve used white cardstock as the base of my layout. What I’ve done is used the green and gold washi tape and put an entire strip down the right hand side of the layout. I love using washi to create backgrounds and the washi this month was just stunning. the other two strips are the vellum which was included in the kit.
Finally I just used some white tissue paper from my stash and accordion folded it and stuck it down with double sided tape. 
I have just matted the photo with one of the papers from the kit and just a doily from my stash. Also under the photo I added two strips of one of the washi’s included in the kit. For all the little embellishments around the page I used the resin flowers included in the kit as well as the pink flair from the kit and also the circle paper clip and one of the beautiful paper flowers from the kit as well. Finally I just added some tiny word stickers from my stash and some little gold hearts and some splatters of blush Heidi Swapp Colour Shine. 

I hope you enjoyed this layout and check out the other ladies on the design teams post they have done some amazing things with the kit this month.
Jaymilee


Friday 22 June 2018

Lauren ~~ June 2018 Kit ~~ Fantastic

Hey Everyone,

This embellishment kit just speaks to me and this layout was born.

I used inspiration from the ribbons and washi to make stripes behind the photo and down the layout.

I started by painting two stripes, one in each colour - peach and mint.

Then while it dried a little I got stuck on building the paper layers behind the photo with the patterned paper I had left. I changed each layer up and even made two of the layers as banners at the bottom.


I then knew I had to adhere the photo with its patterned paper layers to the cardstock before I embellished the stripes further. So I used foam tape (as I have run out of fun foam - for some reason I continually forget to buy more at the shops) to adhere it to the painted stripes. I added some peach and mint coloured thread behind the photo as well.

I then knew it needed a ribbon layer under the bottom of the photo layers, which I made into a banner, before adding other stripes.


I used ribbons and washi to make it the way I thought it looked good design wise.

I then started two embellishment clusters, I knew I needed one below the photo to the left - this was to tie in the stripe layers below the photo. The second one I wasn't as certain at the beginning but thought needed to be on the right perhaps near the photo (and that is where it did indeed end up).


I used a flair from the kit (as well as a flair from DT bonus) and used the paper, resin and fabric flowers to build the clusters. I then dug into my stash for some extra resin flowers and thickers.  The thickers had some awesomely perfectly coloured hearts that finished the clusters.

If you want to see a process video for this layout, check it out here


See you Next time, everyone.


Saturday 16 June 2018

Amy- June Embellishment Kit - 12x12- The Lucky Ones

Hey Scrapping Peeps,

Amy here with my first creation for the month using the beautiful pastel coloured embellishment kit. I loved this kit as soon as I saw it, with lots of ideas for how it could be used popping into my scrappy brain. So let me share with you this first one. I have used a piece of 12x12 patterned paper from stash as my background paper, then added some texture with paste through a rose stencil.

I then used 2 pieces of patterned paper from the kit to matte my photos. Then was time to get pretty with the embellishments from the kit. I have used 1 of the resin flowers, paper clips, lace flowers and lace ribbon. I also used the washi from the kit to add as backing to some labels from in my stash to note down some journalling on my photos.

The gold thicker title, leaf and hearts are also from my stash and added just a little bling to the layout.

I also have a process video over on my channel for this layout so just click on the link to check it out.

https://youtu.be/QL7VAi7_m1M

Until next time,
Happy scrappin
Amy

Wednesday 13 June 2018

Jaymilee - June Embelishment kit - 8.5 x 11 layout

Hi lovely ladies, I’m up on the blog today share my first project as a design team member. I created this layout using 2x2 photos of my dogs using the stunning June embellishment kit. I just loved the peach colours. I will admit the mint green did throw me a little to begin with but I think I made it work here with this 8.5 x 11 layout.


My first thought when seeing the amazing washi tapes was I wanted to use them as strips to create a background. A signature style of mine is using white backgrounds for all my layouts. What I’ve done to save as much of the washi as I can was I measured up where I needed the washi tape to be and just left the parts that would be covered empty. Next I used strips of the patterned paper that was included in the kit to finish the background.


To matt my photo I used the peach polka dot paper and ripped the edges to give a torn look. A torn look gives a really great effect and makes your photo really stand out as your eye goes to the torn look of the paper.
  
I used one of the mint papers in the kit and just cut it into the shape of a tag. Then I used Mont Marte yellow pink paint over the middle of the tag. I also cut the peach ribbon that was included in the kit and cut it down the centre then stapled it on to the tag. I just can’t leave a tag without some form of twine or ribbon. And the peach ribbon worked perfectly for this.


I’ve just used some pink paisley alphabet stickers from my stash as they went really well with the kit. Also just used my own script writing to write the word love. This technique of writing is really easy and it a great way to add a more personally detail to any layout.


Finally just to add some small details on the page I’ve used some Maggie Holmes tiny word stickers and some resin flowers and wood veneers from my stash. I have also just used some blush Heidi Swapp colour shine to do some splatters and also some gold paint.


I really love how this layout has turned out. Also I hope you all get some inspiration on how to use the beautiful June peach and mint embellishment kits.


Thanks Jaymilee.


Saturday 9 June 2018

Lauren - June 2018 Kit - Memories


Hey everyone,

I am loving  the softness of June embellishment kits!!!

I have been inspired  by many around on social media that have made similiar design layouts. 

Each  patterned paper (including the vellum) went together superbly so knew had to use them all together. I cut a triangle from each piece  and positioned in a windmill style on the layout.

It looked a little bare, like it needed more triangles but i didn't  want to clutter the layout  too much so instead  I reached for the amazing  washi in the kit. I did yank a peach thin washi from my stash to even it out.

I then grabbed my sewing machine and outlined the paper with stitching.

It was time to add the photo, title and embellishment cluster to complete the layout.

I used a black and white photo that  had white border so that it didn't  clash with the sweetness of the colour scheme of the kit.

I lifted it  up with foam tape, positioning it in the middle so that it covered the joins of paper and washi (sneaky hehe).

I knew that word veneer was made for this layout so it was first part of the cluster  to make it to the layout. 

Next was  the circle paperclip, flair and paper flower. I played around with some of the other amazing  embellishment pieces before settling on a few of the resin flowers. 


Friday 8 June 2018

Connie - June Embelishment kit - 12x12 Layout!

Hey Hey! ... scrappy friends!

Connie here today with my first ever Design Team post! ...
This months kit is to die for, stunning vintage colours with some beautiful lace pieces.
I fell in love with this kits as soon as I had it in my hands! I instantly knew what I wanted to do & the photo I was going to use!

So for this kit I decided to do a 12x12 layout, using a black & white photo of my daughter Jorja on her grade 6 graduation night! I am a professional photographer, so I opened my studio before the graduation started so all the kids could pop around & have a mini photo shoot!

I love this photo of my daughter looking so beautiful & grown uo up! ... Boy do they grow fast.
I also as a extra treat filmed a You Tube video of my process. Link for the process video can be found at the end of the post!


Here is the link to the YT channel - Blissfully Creative Art
Thanks everyone for stopping by to check out my first DT post! Would love some feedback & if you have any questions please ask in the comments below!

Until next time! ... 

Connie ... xxx

Wednesday 6 June 2018

Raelene - June 2018 Kit - Memories of Music Camp

As I went through my photos to pick some out to work with June 20018 Kit I was drawn to this photo of my daughter taken at her first Music camp in 2009.  The realisation that she was just a year old that Mr C in this photo brought up so many emotions.
This photo was taken by the photography class at the camp so I don't have other copies of it.  I noticed on the back of the photopaper that it has signs of acid damage already so I was careful with embellishment placement so I can scan it with the CamScan app and back it up just in case, but my hope is that now that it is out of the envelope it was in and is glued onto acid free paper with acid free glue no further deterioration will occur.

I started by playing with the papers to create layers that I liked and pulled in the peach lace as a layer, I trimmed the lace in half lengthways so I could save the part that would have been under the photo.
I added in a paper doily from the September 2017 Kit and added the clip and a resin flower from the June 2018 Kit.


Once happy with my layers I glued them with Helmar Acid Free Glue.
I glue the resin flower down with Helmar 450 Quick Dry Glue.

I played with embellishments to create a cluster I like and decided it needed the Corbett Creations Wood Veneer Memories as a title which the cluster of flowers would go against the left side of it.

I have used the lace flower and a base for 2 of the paper roses so it kind of acts like the leaves.


I decided I needed something at the top and bottom so the half of the lace that I had trimmed to save I cut into 2 and glued along the top left and bottom right corners, trimming the overhang.

I felt these needed something more so I added a punched out circle from the mixed media style paper and a resin flower to them.


To pull the mixed media paper into the rest of the layout I trimmed a strip from it and tucked it into the right of my layers.


I finished my layout with a doodle border in mint and journalled briefly about the camp in mint next to the wood veneer so the title would connect to the journalling.  There is so much to record about this camp that  I have decided to do a fold out or pull out with journalling about our memories of her going on her first music camp when I next get some scrapping time.


I love how the layout turned out.

There are still a few of the June 2018 Kits left so if you would love one head to the Subscription Tab and fill in the form.


Saturday 2 June 2018

Lisa - June Kit - Pretty Girls

Hello friends, and welcome to my layout using the Scrapping Fun June 2018 Embellishment Kit. There are some really pretty colours in this kit and I love the lace theme. It is often difficult to find photos that colour coordinate and especially when you are working with old 35mm prints from the 80's & 90's, but I just go with it and I think the lovely colours of the kit bring something special to otherwise very ordinary photos.
I sprayed the white cardstock with a mix of peach and green mists and then tones done the colour with some white mist. I forgot to use gesso as an undercoat... Oops... so the cardstock warped a little but I flattened it out with some heavy weights.


The Title is a mix match of some chipboard lettering I had in my stash and I have placed in on a strip of the gorgeous mint coloured lace from the Kit.

I then matted the 4 cropped photos onto 2 pieces of the patterned paper from the kit, which I have distressed with some vintage ink.

Along the left side of the photos, I added the peach coloured ruffles from the kit. I love the "prettiness" this adds to the layout.

I didn't matt the photos as they are already quite bold and I wanted them to blend in rather than pop.


Along the right side of the photos, I have put the Journalling on a little tag from my stash which colour co-ordinated so well. Trimmed with some washi from the kit and topped with the metal swirl from the kit at the top of the tag.

The cluster has the pretty lacey flower, flair and resin flowers from the kit. The Words are from my stash. 

Hope you enjoyed my layout. See you again Soon !!


Friday 1 June 2018

Raelene - White with 1 June Challenge - Marvelous Technology

Raelene here with my Guest Designer layout for the White with 1 June Challenge.
When I saw the name of this month's colour I just had to try and include some bits from the STEM/STEAM kit.  In addition to the bits from the April Kit I pulled out supplies from the May kit, a paper from a TN kit and supplies from a upcoming kit so I would have a variety to choose from.  Unfortunately my shade wasn't quiet right but

I was torn between photos of the boys first days of school this year or photos from morning tea with my cousin last year, in the end I went with the school photos as Mr C loves space so the prompt really drew me to recording a memory specific to my boys.


Due to the length of my ribbon I decided to do a TN layout as it was only a couple of millimetres too short so I cut it so the gap would be behind the embellishment on the journalling spot, this flair from the May 2017 Kit hid the gap nicely.


Instead of the journalling the sketch shows I cut down a paper bag to size and used some Helmar Professional Acid Free Glue to stick the base and side back together and used this for some hidden journalling, the sketch had a small tab on the journalling card so the flap of the bag was perfect for this.

As this layout is about how technology has allowed my kids to attend school from home and learn about all kinds of wonderful things I decided to use the Mars Rover Flair and a Moon Sticky note for the bottom embellishment cluster with 2 cute washi from the TN Kits.


I love how this layout turned out.