Showing posts with label morgyn. Show all posts

Saturday, 19 May 2018

Morgyn ~ May Fundraising Kit ~ Monthly Planner Spread in my Travelers Notebook

Hi Everyone,


I am using my travellers notebook planner to decorate my monthly spread for May. 


I really liked the zebra straw that came in this months kit but couldn't work out how I would be able to use it on a page.  Then I thought maybe if I cut it up the middle it would be flat enough?  So i sliced up the middle and flattened it out a little but it was still a tad bulky so I pulled the back couple of layers off and voilà perfect to attach to the top of my pages.


Next I fussy cut out the butterfly and attached that in the top left corner, there was a space with no numbers so it fitted nicely in there.  Next I added the beautiful butterfly washi tape to the bottom right corner and I finished it off with 2 half strips of the black and white chevron washi to mark a couple of important dates for May.

Thats it for this one, nice and quick and easy.

Thanks for stopping by


Morgyn  xx


Scrapping Fun Kits is fundraising for Starlight Children’s Foundation this month. All profits from sales of the May Embellishment Kit and kit extras will be donated to Starlight Children’s Foundation. If you would like to donate directly to Starlight Children’s Foundation you can do so via their website https://starlight.org.au/donation-form

Monday, 7 May 2018

Morgyn ~ May Moodboard ~ Remember Kindness

Hey Everyone,

Morgyn here sharing my take on this months moodboard challenge.  I am creating in my travellers notebook for this challenge.


May is the Awareness month for Ehlers-Danlos Syndrome (zebra), Fibromyalgia (purple) and Myalgic Encephalomyelitis (blue) among other things.  Raelene (Scrapping Fun Kits) was inspired to create a Moodboard for May featuring the colours of awareness for each of these conditions.


I used the large pattern paper from this months embellishment kit as my background piece.  I then mixed come texture paste and black gesso together and used it through this stencil that's been sitting in my stash unused for the longest time. I really love how this turned out.


Next I used this 'beautiful' die cut piece and a fussy cut butterfly to create a little embellishment cluster to the bottom left.  I added a sequin from my stash.


Next I added another fussy cut butterfly and some more purple sequins to the top right corner to balance it out.  Finally I used the 2 wood veneer words from the kit to finish off the page.

I would love it if you popped over to my YouTube channel and watched my process video.

Thanks for stopping by

Morgyn  xx


Scrapping Fun Kits is fundraising for Starlight Children’s Foundation this month. All profits from sales of the May Embellishment Kit and kit extras will be donated to Starlight Children’s Foundation. If you would like to donate directly to Starlight Children’s Foundation you can do so via their website https://starlight.org.au/donation-form

Saturday, 14 April 2018

Morgyn ~ Card, tags and Labels... Oh My! ~ April Kit

Hi everyone,

I have a bit of a different project to share with you all today.  This months Scrapping Fun Kit was based around a S.T.E.M (Science, Technology, Engineering and Maths).  At first I didn't know what I was going to create, but after looking at all the cute little pieces I realised I could make a few things.

First up is this little card I made for Sam to give to his best buddy (he is turning 6 soon).


Next up I wanted to make a little tag that I could put on his gift, so I cut out a tag shape from some cardstock.  Added 2 strips of washi tape to the bottom then fussy cut the rocket ship and added a couple of sequins.  The blue twine was left over from a previous kit.

I still had this adorable wood veneer  (shout out to Jodi at Corbett Creations) pieces that I really wanted to use.  I thought for a bit then realised they would be perfect as folder labels for our homeschool subjects.  I cut down some white card stock to 2x3 inches attached a strip of washi tape to each, glued down a wood veneer and added some alphas from my stash - it doesn't get much easier than that, and they look so adorable!

I do have a short process video up on my channel if you want to watch me make all this goodies.

Thanks for stopping by

Morgyn xx

Monday, 2 April 2018

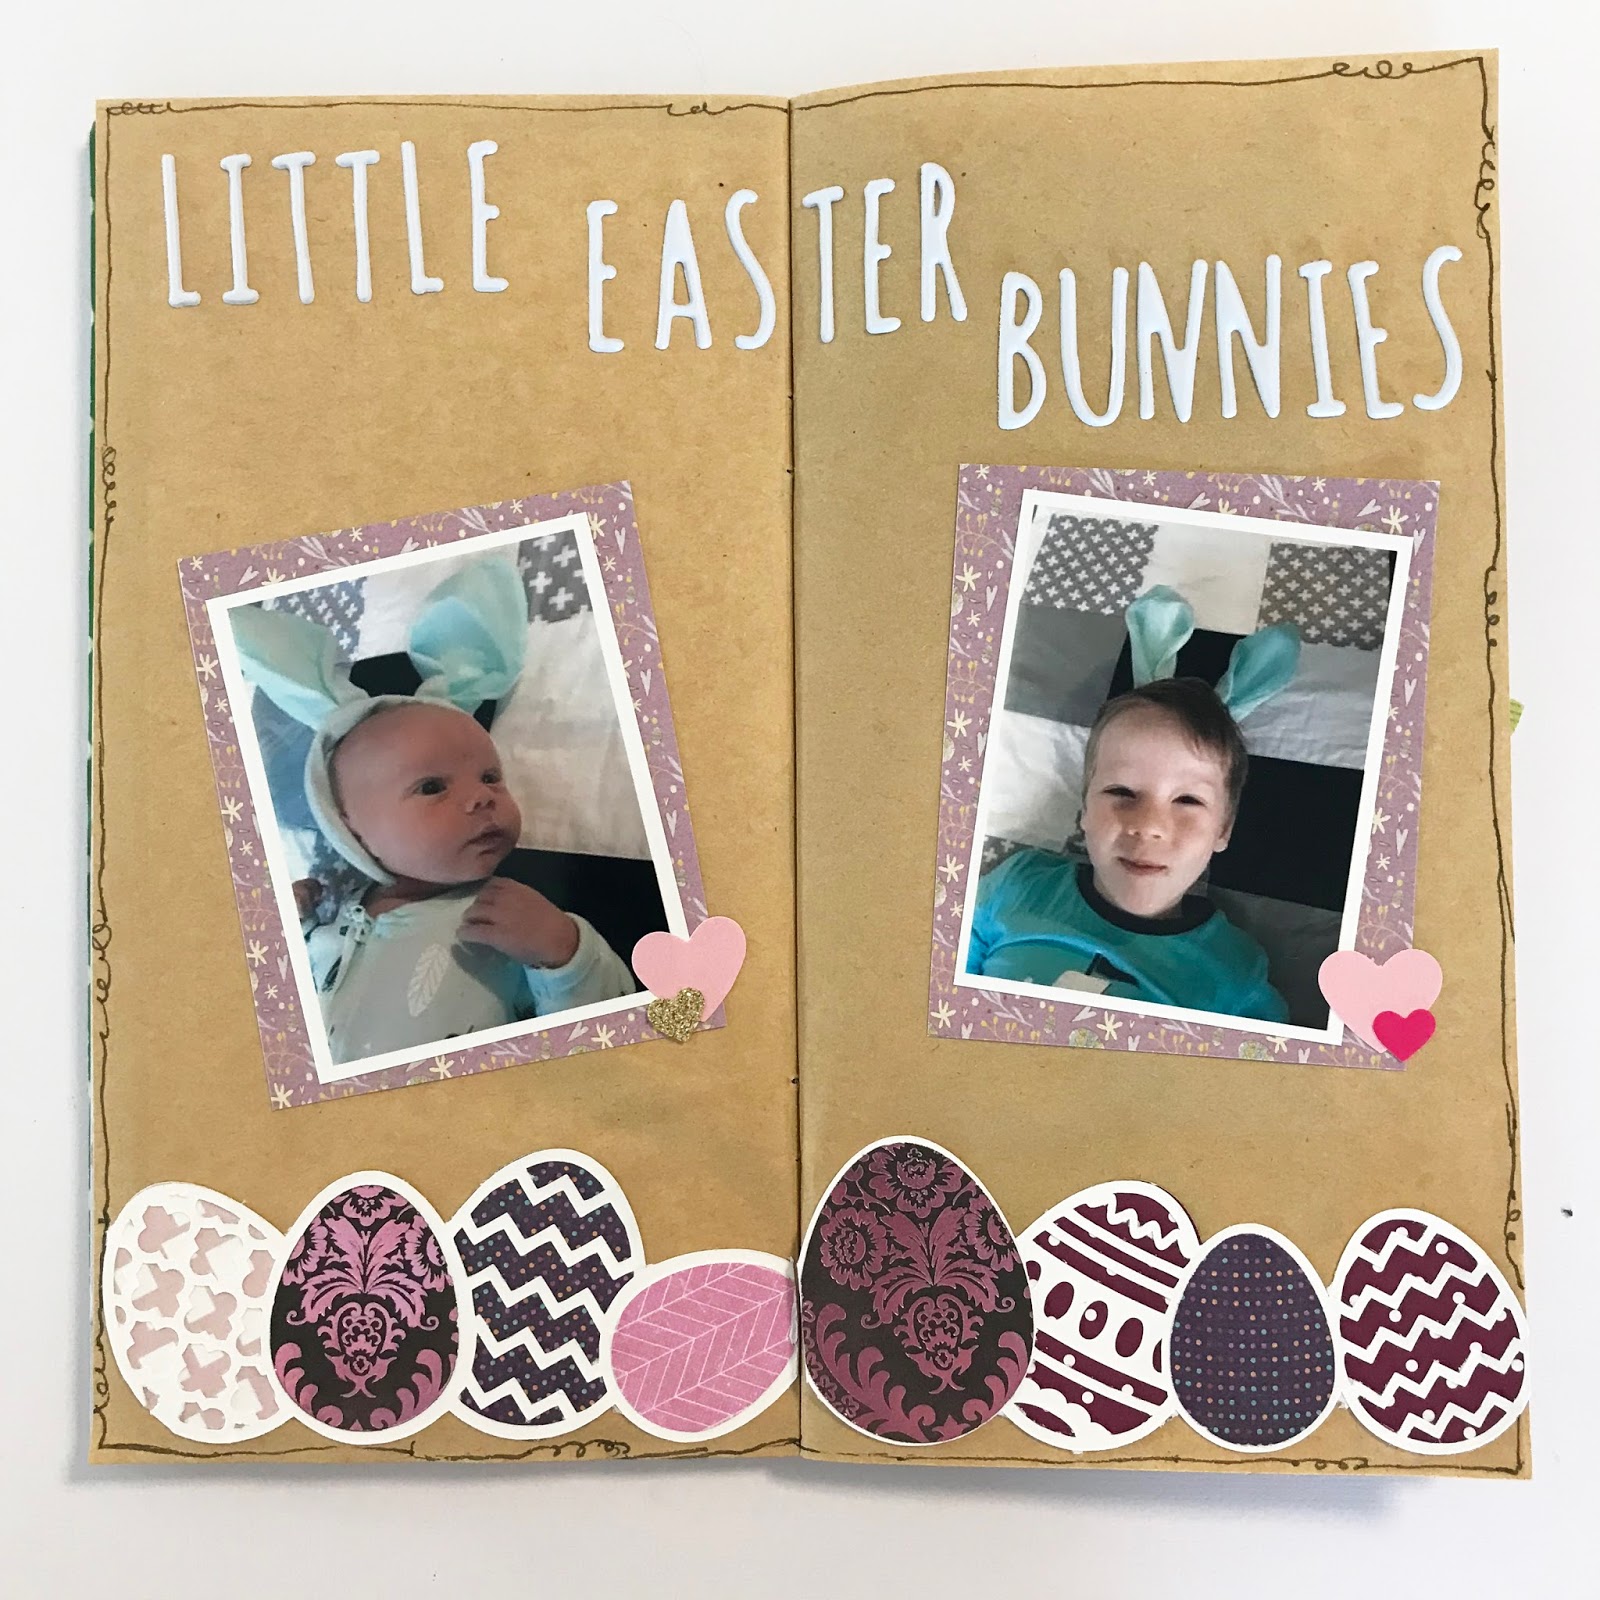
Morgyn ~ Little Easter Bunnies ~ Easter Moodboard Challenge

Hey Scrappers,

Morgyn here with my take on the latest moodboard challenge over at Scrapping Fun Kits.
This is such a awesome mooboard, mainly because I love purple and of course the adorable billbies.


I decided to use my travellers notebook for this layout, if you haven't given this size a go, do yourself a favour and grab one (you can get this one in the basic's kit) it's really fun to work with.


I knew the perfect photos to document for this layout, my 2 little bunnies from Easter 2017.  Roman was only 5.5 days old and so tiny. I used the purple paper from this months Scrapping Fun Kits Easter kit to mat my photos (it's the same paper as in the moodboard... too perfect 👍)


I designed this little eggy boarder in Silhouette Studio then cut the white part out of cardstock and all the little eggs from some scraps of purple and pink paper (I love finding ways to use up scraps).

*I will leave a link to silhouette file below*


I found a whole sheet of heats in my stash and used them as some little photo accents.  Then added in my title using this super cute puffy alphas, before finishing off the page with a doodle boarder.

Click here to grab yourself the Silhouette file for the eggy boarder

You can check out my YouTube Process video here.


Thanks for stopping by

Morgyn   xx


Thursday, 29 March 2018

Morgyn ~ Autumn TN Kit ~ An Autumn Day

Hi Scrappers,

Sharing my latest travellers notebook spread with you today.  I am using my Kraft notebook from the Scrapping Fun Kits, basic kit and the Autumn Travellers Notebook kit.


I started with the green and purple piece of paper for my background and built the rest of the page up around that.  I cut out the arrow die-cut then used the kit alphas for the 'notes' label.


I matted my photo with the red die-cut piece. I popped a tag behind the photo for my journaling, using the kits washi tape along the bottom of the page to fill in the gap of the smaller paper.


On the left side of the page I added the red boarder strip to match the red mat behind the photo.
To finished off the page I added a couple of circle embellishments.

This page together so easily and only took 15 minutes, it helps that the kits are so nicely coordinated.

IF you would like to check out my process video you can find it here and if you would like to subscribe to Scrapping Fun Kits you can follow the link here.

Thanks for stopping by

Morgyn  xx

Saturday, 17 March 2018

Morgyn ~ Easter mini album ~ March Kit

Hi Scrappers,


I am sharing a little Easter project with you. I wanted to do something a little different to document Easter this year, so I decided to make a mini album and this months Scrapping a fun kit was perfect to embellish this little mini.


I made the mini album from scratch (you can see my process video here).  I used this cute bunny paper from the kit to cover the outside, then added my title (both from my stash and the kit)


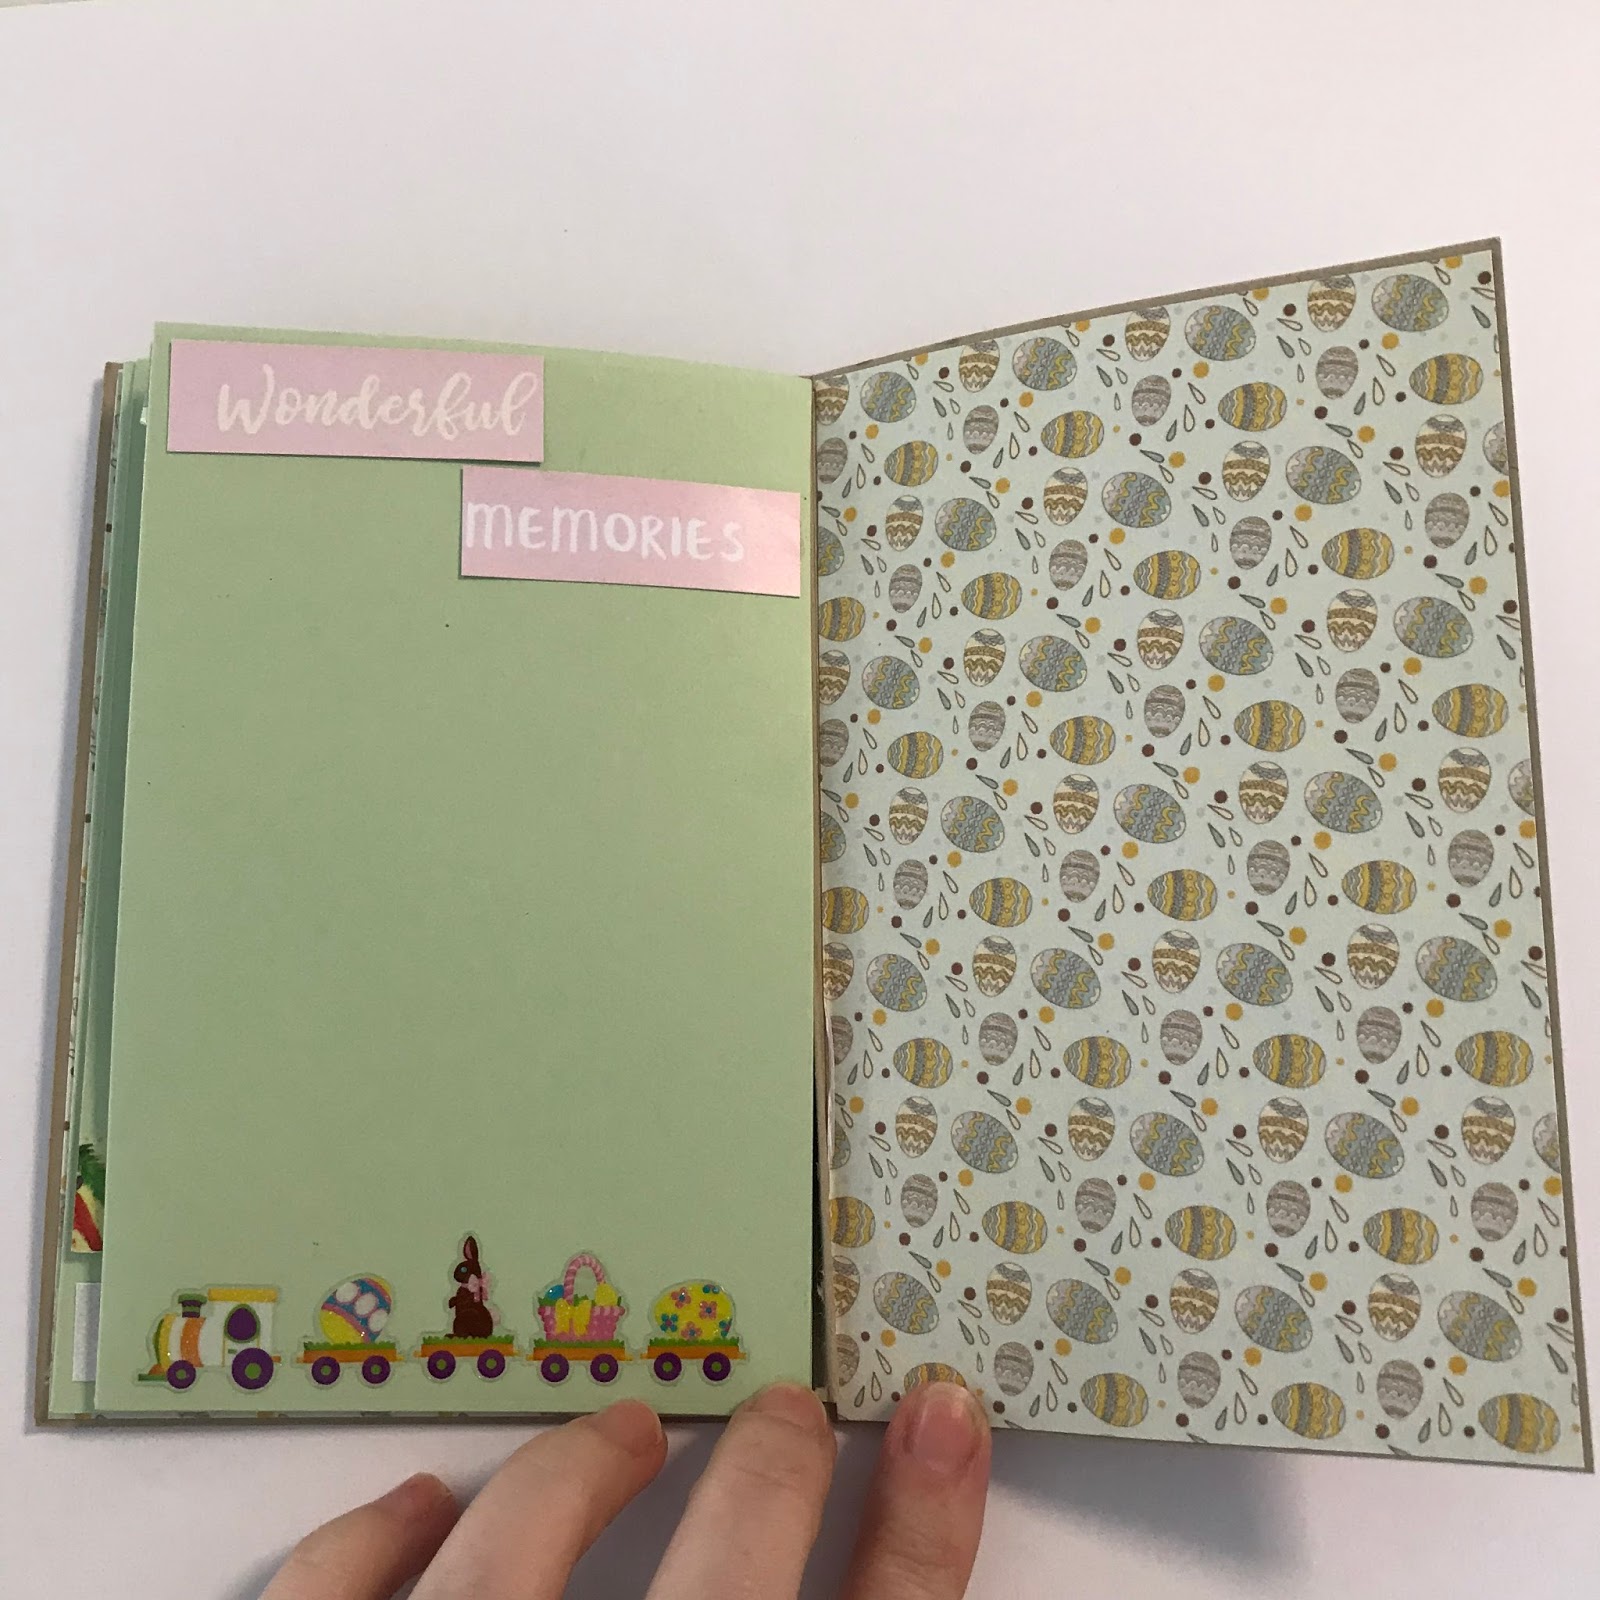
For the inside pages I used some light green card-stock to create the pages, flaps and pockets. I lined the inside covers with another piece of paper from the kit, then finished off the first 2 pages with some cut apart pieces.


The middle pages I made a lift up flap and a little pocket. I used a cut apart piece to fit in the pocket for some journaling and a photo.  Embellishments from the kit and also from my stash, love the pink puffy bunny sticker!


For the back page I added these cute bunny train stickers to the bottom of the page and added another title.  Again finishing off the inside back cover with the easter egg paper.


Don't forget to check out my full process video here.
You can subscribe to Scrapping Fun kits here.

Thanks for stopping by

Morgyn

Saturday, 17 February 2018

Morgyn ~ Travellers Notebook Kit ~ Colour Fun Run

Hi Scrappers, Morgyn here sharing my latest layout using the Summer Travellers Notebook kit (and some of the promo kit Raelene had given me) from Scrapping Fun Kits.


I love how perfect this photo is to use with the Summer kit.  Sam had a colour fun run at his school late last year and this was the after photo.  He was given the pair of yellow sunglasses he is wearing, how wonderful is the sunglass paper and sticker to match?


For the left hand side of the spread I used a paper from my promo kit as the pink matched the splatter on the other side.  I used the blue boarder strip down the middle and a piece of the pink/yellow washi tape.  I mounted my photo on a yellow embellishment piece and used the rainbow letters for my title.


On the right side of the layout I used the sunglasses paper for my background, then I cut out the pink 'summer splash' from an embellishment card.  Together with the sunglasses sticker they made a neat embellishment cluster.  For my journalling spot I trimmed down a journal card and used a green boarder sticker to make another little cluster.

This page came together so quickly and easily (it helps that all the kit pieces coordinate together.
If you would like to find out more about the kits you can find the subscribe page here.

If you would like to see my process video for this layout you can find it here.

Thank for stopping by

Morgyn  xx

Thursday, 15 February 2018

Morgyn ~ Valentines Planner Spread ~ February embellishment kit

Hi Crafty people,

Morgyn here sharing my current travellers notebook planner spread using this months embellishment kit. It was too perfect for Valentines day 💕


Here are a couple of close ups of each page.


I used the wider heart washi tape to mark Valentines day.  I added a little title with my own red hearts too.  I used red and pink pens for my days & dates to match with the fun washi tape.


I trimmed the other washi tape in half lengthways to make a border at the top, then used the skinny washi at the bottom to mark off my meals section.  The gold 'love' paper clip was super perfect to mark my page in the planner (makes it nice and easy to find the week i'm up to).

Have a great scrappy day

Morgyn   xx

Tuesday, 23 January 2018

Morgyn ~ School Kit ~ Week 4 Travellers Notebook

Hi Scrappers, 
Morgyn here with my current weeks planner spread in my handmade Travellers Notebook.  I am using the School embellishment Kit to decorate this week.


I loved the rainbow star washi tape and decided to use that as inspiration for the rest of the spread.  I used them as my check boxes for both of my to-do lists.  I used the alphabet washi tape to make a little boarder above my meal planning section.


On the left side of the spread I labeled all my days of the week and dates in multiple colours - to match the star washi tape.  I used the back to school washi tape to label the first day of school for the year.  I also marked Australia day in green/yellow to keep with my multi-colouled theme.


I loved the cute apple paperclip and used it to mark the current week in my planner.  To the right of the image is all the pretty pens I used on this spread, how pretty is a rainbow of pens? :)

Thanks for stopping by

Morgyn xx

Thursday, 18 January 2018

Morgyn ~ Summer Kit ~ Travellers Notebook

Hi Scrappers,
Morgyn here with my latest Travellers Notebook scrapping layout.  I am using the Summer Travellers Notebook kit from Scrapping Fun Kits.
I took this photo of my 2 boys just the other day, while they were having a little paddle in the pool.  It was a super hot day and the temperature had got up to 41 where we live, so the cool water was most welcome for all of us late in the afternoon.


For the left side of the spread I used this green & white polka dot paper as my base - it matched the colour of the pool perfectly.  I added my title using the Alpha stickers from the kit along with a few others from my stash.  My title 'One fish, Two fish, Red fish, Blue fish' is from Dr Seuss which is one of our favourite authors to read with the kiddies.  I thought it was a perfect title for my 2 little fish.

I added some washi tape and embellishments to the bottom corner to finish off this side.


For the Right hand side of the layout I started with some painting the background with some orange/yellow Dylusions paint. Pure Sunshine is the colour name... to perfect for this layout right??
I added the summer paper piece and then my photo.
For the embellishments I used 2 bits of washi tape in the top right corner ('Monday' is from the basic's kit).  The little fish sticker was a great addition to the page and suited the title very well.
I added the date and my journaling to finish off the page.


I love how this little layout came together in about 25 minutes.  Travellers Notebook is the perfect size for documenting the little things quickly and easily, plus the Scrapping Fun Kits are so well coordinated it makes it even easier! Subscribe to get your own here.

I have a process video up on my channel if you would like to see how I put this together.

Thanks for stopping by
Morgyn

Monday, 8 January 2018

Morgyn ~ Summer Kit ~ Moodboard

Hi Scrappers, 

Morgyn here with my take on the moodboard challenge (pictures below). You can find all the information on how to enter here.


I have once again gone with a travellers notebook spread for my layout - this is my favourite size to scrap with at the moment. I have used the current Summer kit for my layout .


I used this fun paper as my background piece and added just a couple of embellishments from the summer kit. The t-shirt sticker said Fun in the sun so I cut a sun piece of washi tape from the basics kit and added it to the shirt I also used the number 25 from the basics kit to add the date. 
I really liked the rainbow gradient word from the moodboard and it was inspiration for my title.  The fun multicoloured alpha set that came in the summer TN kit was perfect for this. 


I printed a film strip of 3 photos from our day at Dreamworld making sure to use the photo of Sam eating his giant rainbow ice cream.... just so I could use the super cute Watercolour ice cream washi tape.   Adding in a couple more little embellishments and calling this one done, nice and simple today. 


Thanks for stopping by 

Morgyn xx 

Saturday, 6 January 2018

Morgyn ~ New Year Planner Layout ~ Embellishment kit


Hi Scrappers

Happy New Year!!

Morgyn here with the first blog post of 2018 WOOHOO!!
I am starting off the year by sharing my week 1 planner spread using this months Scrapping Fun embellishment kit.

I am using a travellers notebook that I printed and made myself this year as my weekly planner, you can see how I made it here.


On the left hand side I used the dark purple firework washi tape as a border on the top of the page.     I also used the super cute tassel clip to mark this page in my planner.  I used Staedtler Triplus Fineliner (purple) to add the days of the week and the dates to my page.


On the right hand side I used this super cute multicoloured firework washi tape to make a border on the bottom of the page.  I added in a meals section and to do list (I must have in all my planners) with my Fineliner pen also.

That's all for this weeks spread you can purchase your own kits here.

Thanks for stopping by

Morgyn xx

Friday, 15 December 2017

Morgyn ~ December Kit ~ Weekly Planner Spread

Hi everyone

Morgyn here sharing how I am using this months embellishment kit.

I am using the kit to decorate my Travellers Notebook planner (you can see how I made it here).  I use this as my weekly overview of whats happening and when.  I love that the embellishment kit is so versatile that I can use it in my planner as well as use it to scrap with :)

Here is this weeks spread:


This kit is perfect for this lovely summer weather we are having + my kids have been eating ice blocks like they are going out of fashion!

Here is a close up of the weekly spread:


I have used the roller stamp from the basic's kit to date my days of the week and the pineapple paper clip is a pretty yet functional embellishment to hold any little notes during the week.

A close up of the 'lists' page:

I used the skinny washi tape to create my top 2 sections, then the ice cream and pineapple washi was too perfect not to use for my meals section.  My check boxes are a little messy (as is my writing) I need to buy some of those little stencils I think.

Thanks for stopping by

Morgyn  xx


Thursday, 7 December 2017

Morgyn ~ Travellers Notebook ~ You're 6 Now


 Good morning Scrappers,

Morgyn Here sharing my latest Travellers Notebook spread using the current Scrapping Fun Kits TN kit (you can grab one here).  I am scrapping a photo of my son on his 6th birthday, this was his 3rd cake to celebrate - family, friends, more family = LOTS of cake hehe.


The dot paper I used on this page was my favourite piece from the collection and thought it suited a birthday cake layout. I used a tag from the kit along with the frame label sticker (how cute are those?) to create a base for the large #06 sticker which was from the basic's kit.  I trimmed down 3x4 card to create a little journal spot at the top.


For this page I used this beautiful gold floral paper as my background as it suited so wonderfully with the gold dot piece.  I used the Rhonna Designs app to make a polaroid style frame around my photo.  I used the green chevron washi tape from the kit as a little accent on this page (+ some more on the other side to match).  Using the roller stamp from the basic's kit I added the date and called this one done.  I think this little spread took me about 20 minutes and was lots of fun to make.


Here is a look at the finished 2 page spread.  I love how it turned out, the TN kit from Scrapping Fun Kits match together so well it's easy to put a layout together in no time.

I would love it if you would check out my process video for this layout, you can find it here.


Thanks for stopping by

Morgyn  xx

Wednesday, 6 December 2017

Morgyn ~ December Daily ~ Making the numbers


 Hi everyone,

I'm back with a little project for my December Daily.  This time I am sharing how I created my little number clusters.

I knew I didn't want to just stick the number on the page, that they needed a little bit of oomph so I decided to make some little clusters using pieces from the kit (which you can get here) and some bits and pieces from my stash.


Here I am using a piece of pattern paper from the kit, which I punched out using small tag, square and ticket punches.  I used these to created the base for my clusters.  Then I trimmed down some die-cuts from an old Kaisercraft 6x6 paper pad and add them to the base pieces.  Next I adhered my numbers to the top.


For this little one I used another die-cut from a Kaisercraft paper pad, it's meant to be an arrow but I thought it looked a little like a Santa Cottage.  I added some of the kit washi tape to the bottom and then the red number 2 on top.

I continued with similar combinations until I got to number 25, using pieces from my stash, some from the kit and couple of new bits and bobs.  I really loved how they turned out and can't wait to get them in my December Daily journal.  Here is a snapshot of my final 25 pieces.


I do have a process video up on my channel I would love for you to check it out, you can find it here. Also don't forget to grab yourself a kit to create your own December project.

Thank you
Morgyn  xx

Thursday, 23 November 2017

Morgyn ~ Travellers Notebook ~ Best Buds


Hi Scrappers,
I'm sharing a little layout I created using the Spring kit from Scrapping Fun Kits

I took this photo of the boys on a recent trip to Toowoomba.  They both looked so cute on the big swing together and I just had to scrap it.  The spring kit was perfect kit to accompany this little picture.

I really wanted to use the floral stripped paper and found the pink polka dot paper matched wonderfully.  I edited my photo using the Rhonna Collages app to add a polaroid frame around it. 
I used some washi tape and word sticker across the top of the frame.

On the opposite page I added the date to the library tag and used some tiny word stickers to add the word Toowoomba.  I did my journalling on the flower paper then added a couple of stickers from my stash and washi from the kit to finish off the page.


Here is the completed page

Thanks for stopping by,
if you would like to check out my process video you can find it here.


Morgyn xx